How to Set Up My PetSafe® Happy Ride® Dog Bicycle Trailer
Welcome
Welcome to your new Happy Ride® Dog Bicycle Trailer!
Keep in Mind:
We recommend two people to set up the bicycle trailer.
Acclimation time is essential for your pet to successfully use the bicycle trailer.
Step 1: Prepare

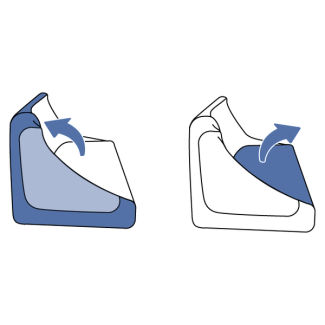
Raise the sides of the trailer.
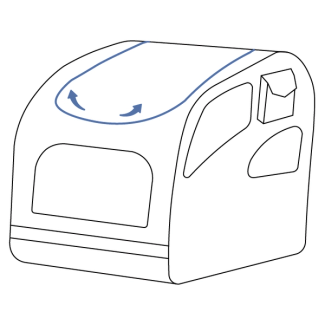
Unzip the trailer cabin and remove parts inside.
Gather the following items before you continue setting up your bicycle trailer:

Trailer base
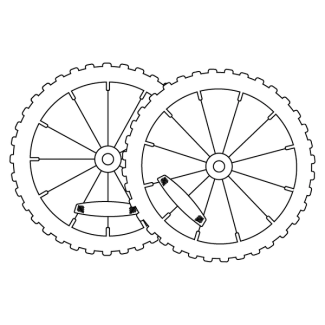
Two wheels

Bicycle tow-bar

Bicycle hitch

Support rod
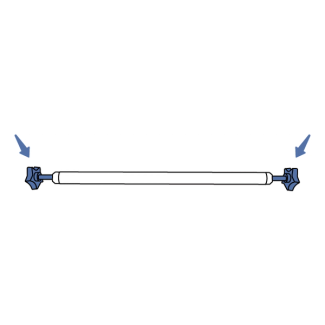
Support rod star knob (2)

Wheel mounting bracket
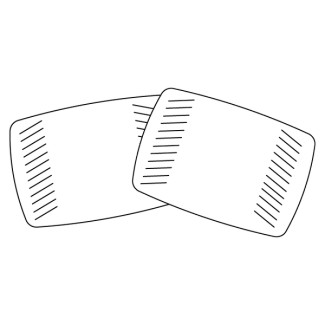
Reflector (2)

Safety leash

Phillips screw (2)

Bolt and nut (2)

Hex wrench

Phillips screwdriver (not included)

Adjustable wrench (not included)
Step 2: Set Up Trailer
Fold the sides of the trailer down and turn the trailer over so the bottom is facing up to begin set up.

Remove the nut, bolt and clevis pin from the mounting bracket on the bottom.
Note: Leave the black spacer in the mounting bracket.
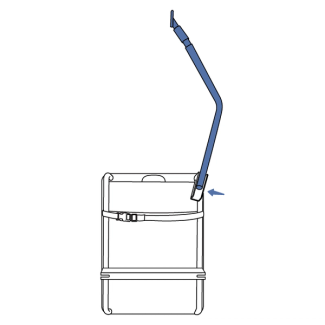
Attach the tow-bar to the mounting bracket by aligning the hole at the end of the tow-bar with the middle hole on the mounting bracket.
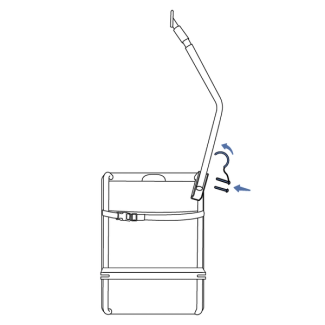
Install the bolt and nut into the middle hole. Install the clevis pin into the hole toward the front of the trailer.
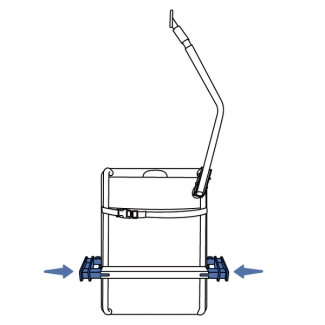
Slide the wheel mounting bracket into the bar on the back of the trailer. Ensure that the bracket faces toward the top of the trailer.
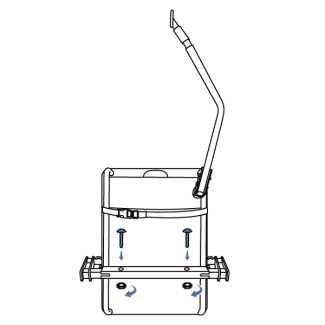
Insert the bolt and nut into the holes on the bar. Tighten using the hex wrench and an adjustable wrench.
Flip the trailer over and raise up the sides.
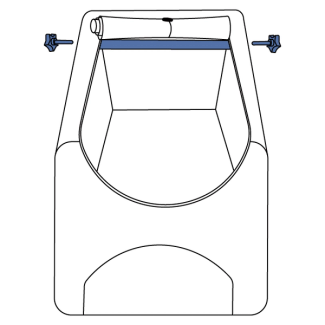
Insert the roof support rod. Line the rod up with the holes on the side bars of the trailer, then screw in the two star knobs.
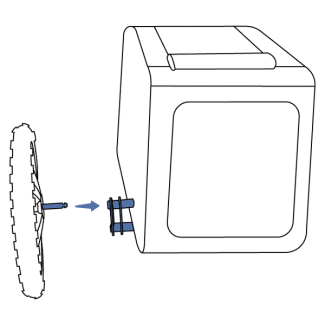
Attach the wheels to the wheel mounting brackets. Push the spring-loaded bolt on the mounting bracket while inserting the wheel, then release to lock the wheel into place.
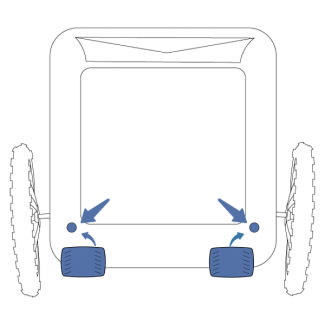
Use a Phillips screwdriver to attach the reflectors onto the holes at the back of the trailer.
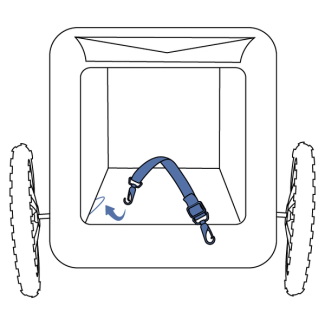
Attach the safety leash to one of the D-rings inside the trailer.
Step 3: Attach to Your Bike
We recommend having two people for this step. One to hold the bike, while the other attaches the bicycle trailer.
Option 1: Standard Wheel Attachment
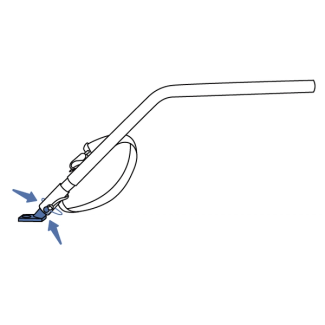
Pull the clevis pin out of the tow-bar to remove the black hitch.
Remove the axle nut from the back tire of the bike.
Insert the hitch onto the axle, then reattach the axle nut. Ensure that the connector on the hitch is facing out, toward the back of the bike.
Note: The kickstand may need to be removed to make room for the hitch.

Attach the tow-bar to the hitch by aligning the holes on the tow-bar and hitch, then insert the clevis pin to lock the tow-bar in place.
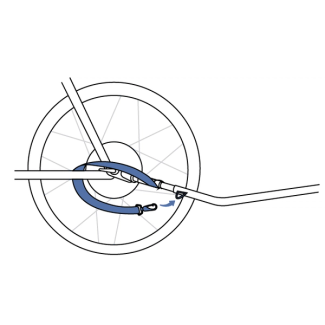
Loop the black safety strap through the bike frame and attach to the D-ring on the tow-bar.
Important: The safety strap adds a layer of protection for the rider and pet should the hitch become detached.
The bicycle trailer is now setup and ready for you to begin acclimating your pet to use the trailer!
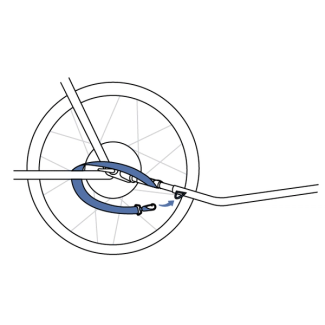
Option 2: Quick-Release Wheel Attachment

Pull the clevis pin out of the tow-bar to remove the black hitch.
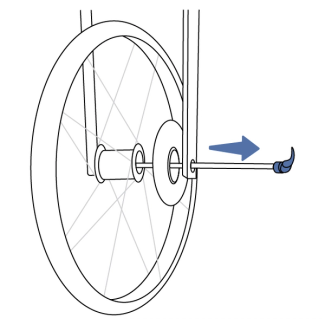
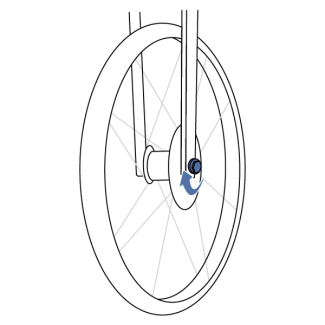
Release the lever on the axle and remove the axle from the bike.
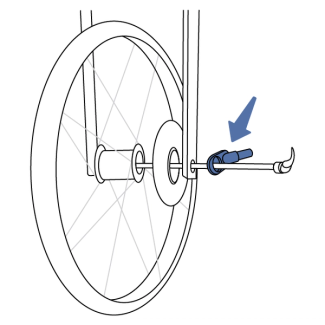
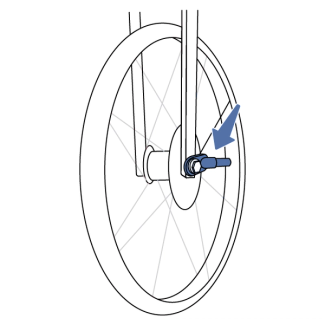
Insert the axle through the hitch and reattach the axle to the bike.
Note: The kickstand may need to be removed to make room for the hitch.
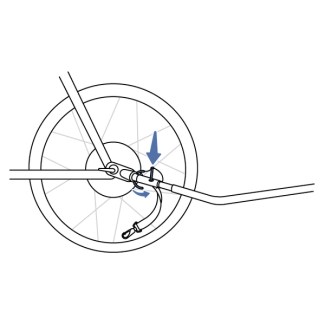
Attach the tow-bar to the hitch by aligning the holes on the tow-bar and hitch, then insert the clevis pin to lock the tow-bar in place.
Loop the black safety strap through the bike frame and attach to the D-ring on the tow-bar.
Important: The safety strap adds a layer of protection for the rider and pet should the hitch become detached.
The bicycle trailer is now setup and ready for you to begin acclimating your pet to use the trailer!
Contact Customer Care
If you need further assistance, please contact our customer care team.