How To Assemble My PetSafe® Happy Ride® Metal Dog Barrier
Included Parts

Assemble Upright Supports
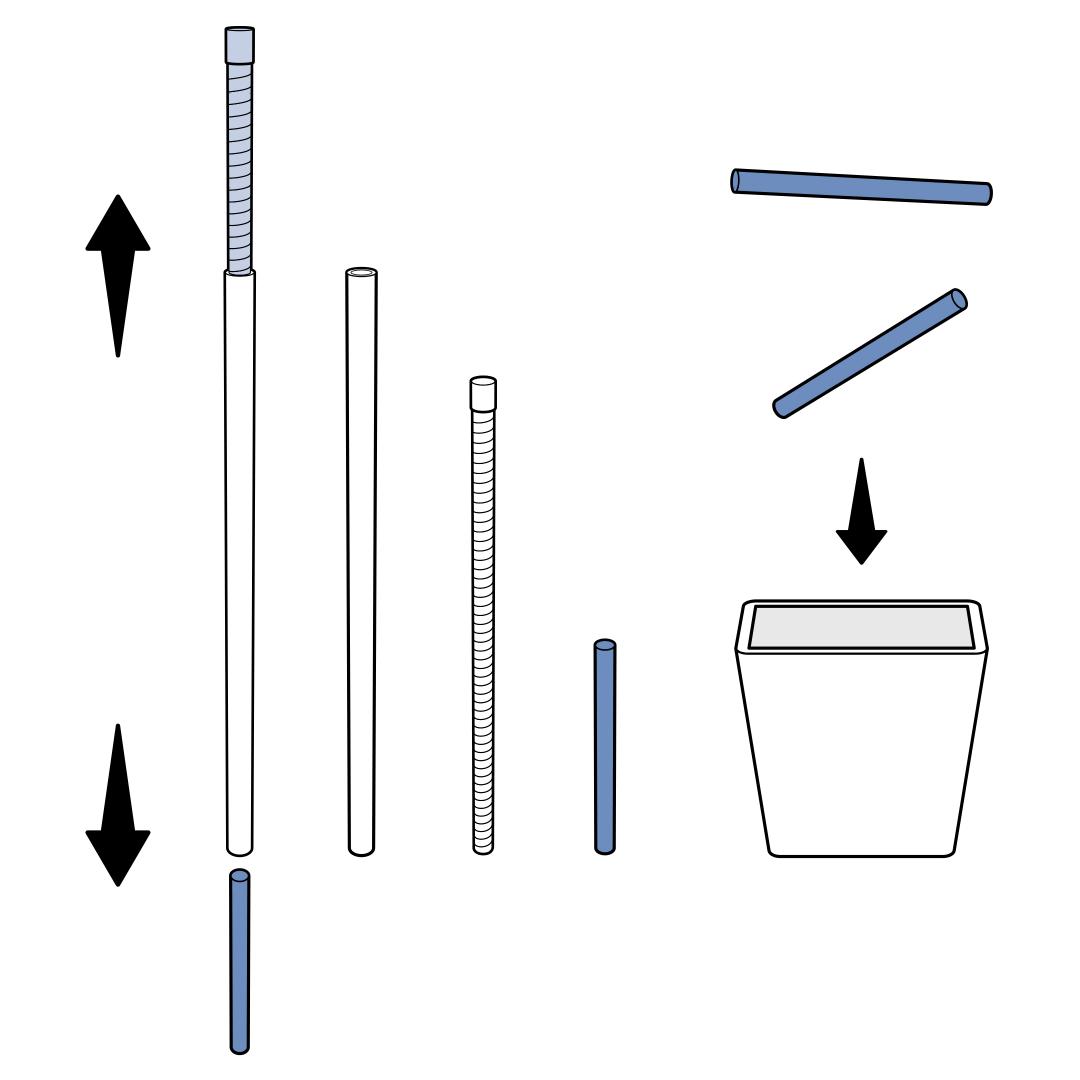
Remove the threaded rod and short black plastic spacer from inside each of the two straight tubes. Discard the two plastic spacers.
Push an oval cap firmly onto one end of each straight tube.
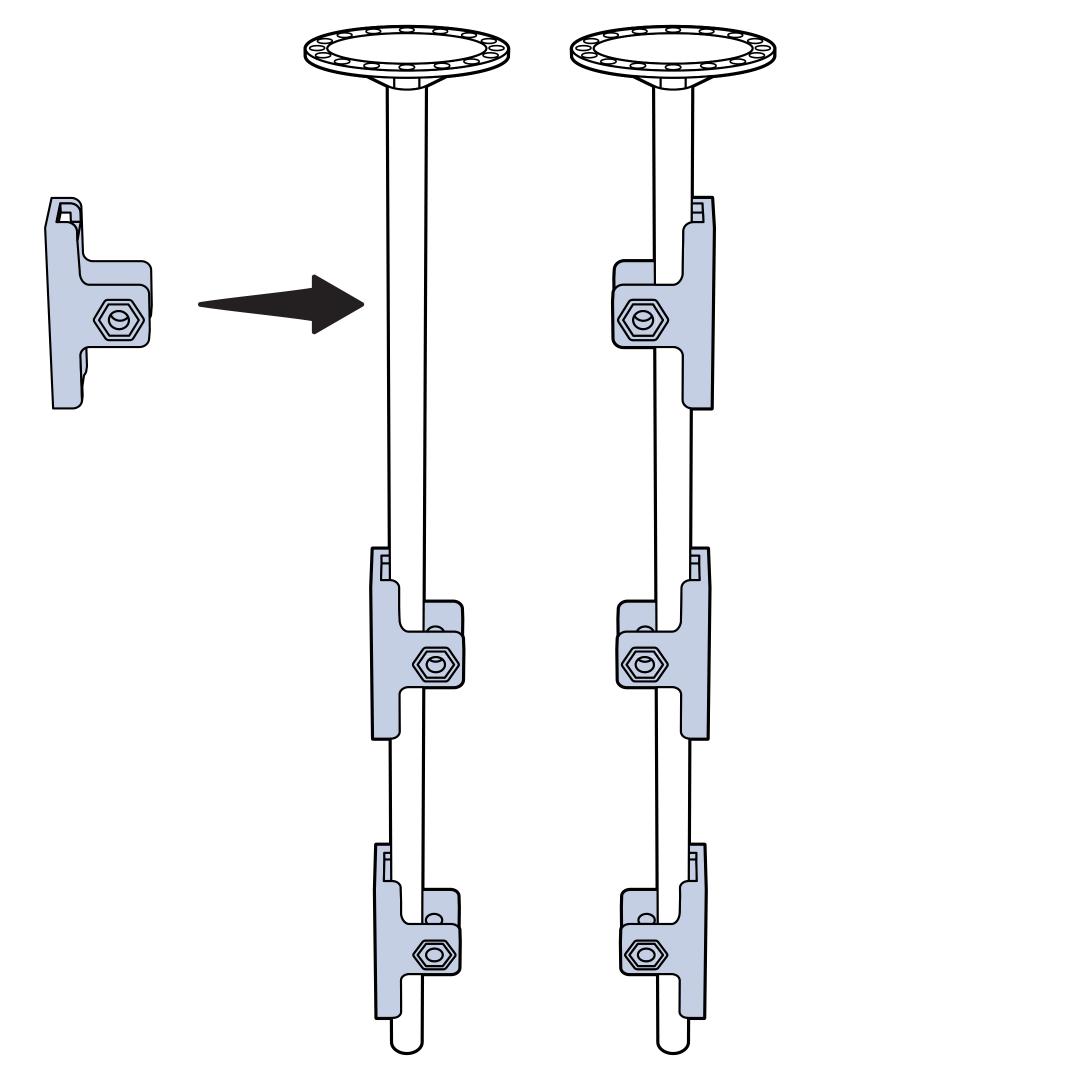
Slip three mounting brackets onto one straight tube with all the hexagonal holes on the same side. Repeat this for the other straight tube with the hexagonal holes on the opposite side so the two tubes mirror each other.
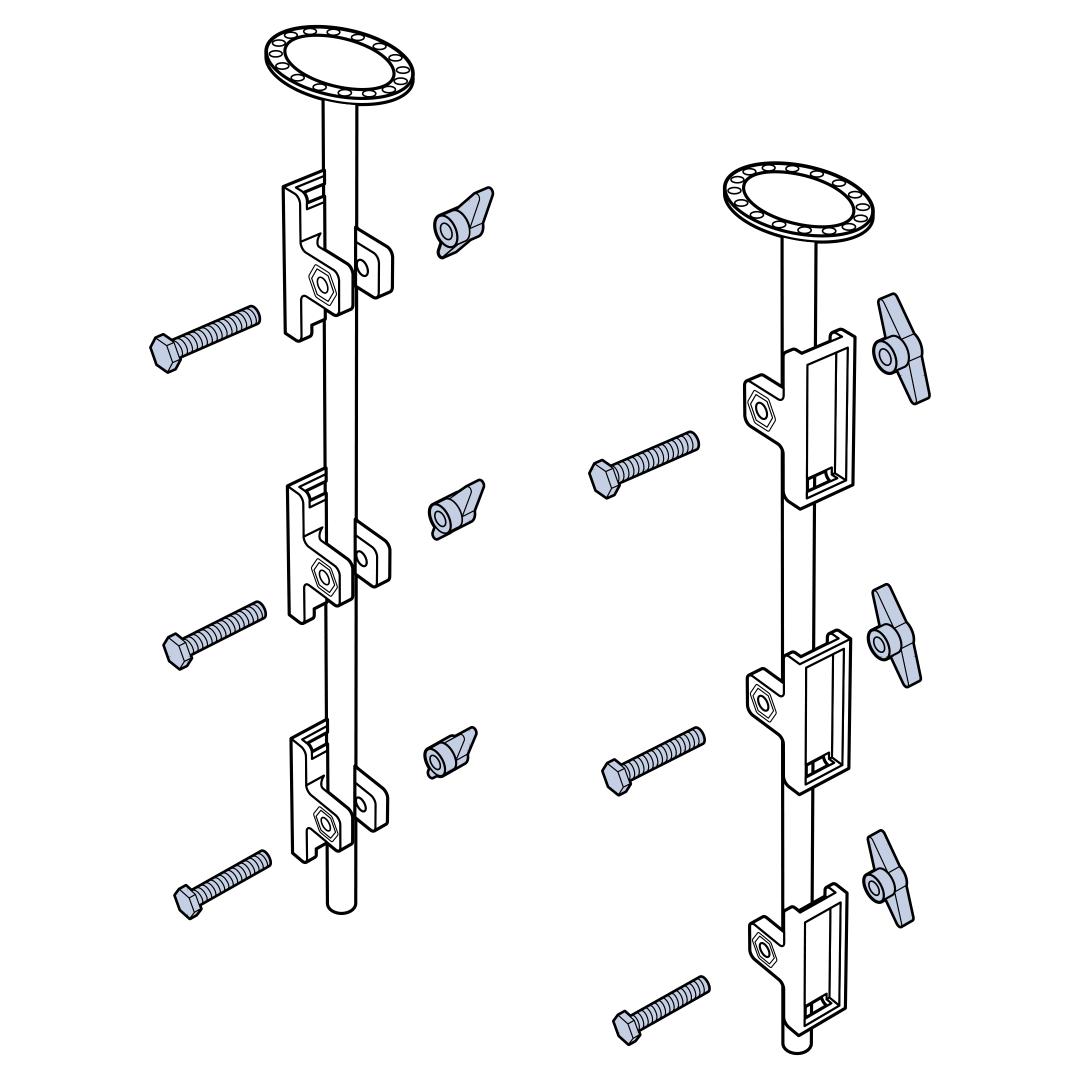
Insert a short bolt through each mounting bracket fitting the bolt head into the hexagonal hole. Screw a small wingnut onto each bolt, leaving it loose to allow for adjustments later.
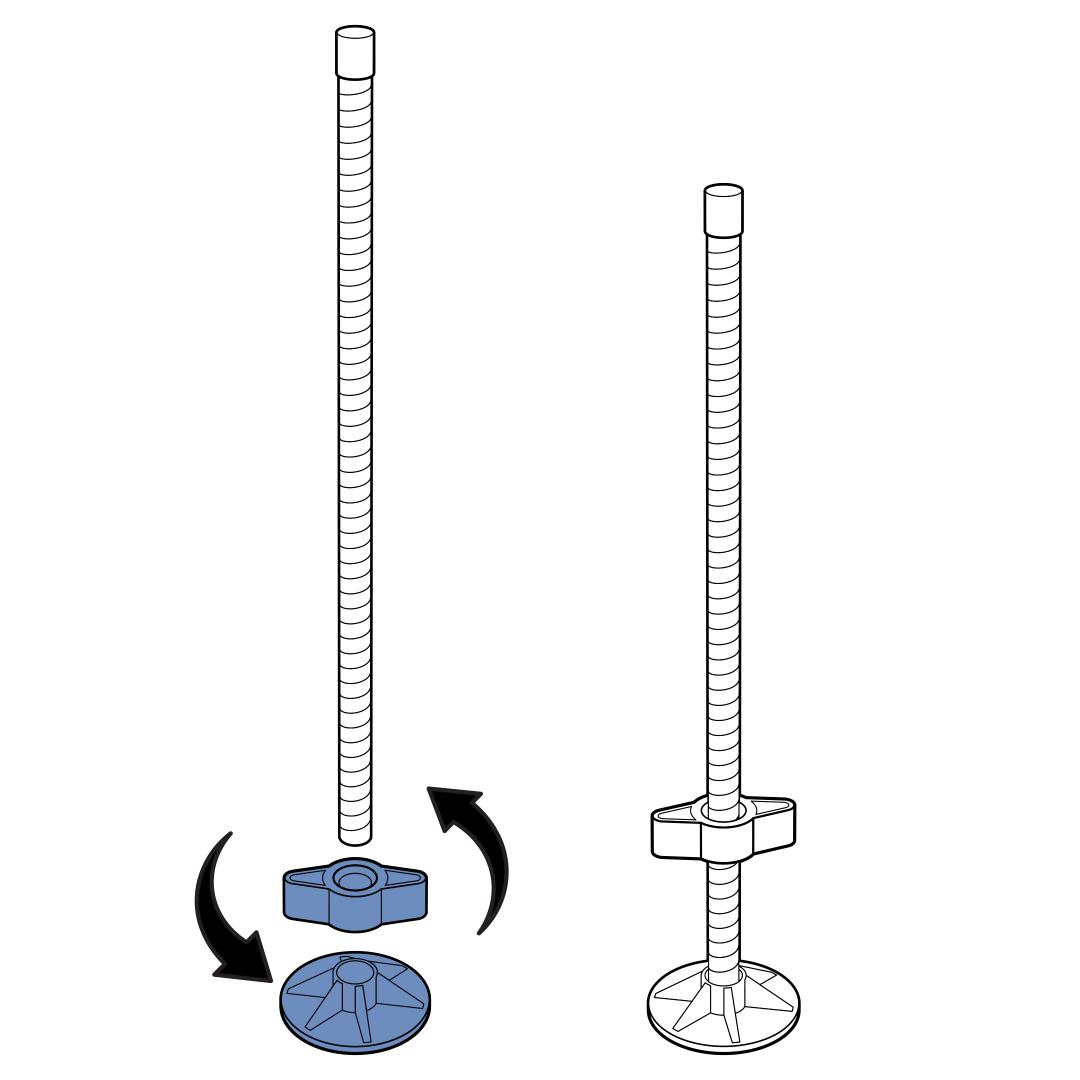
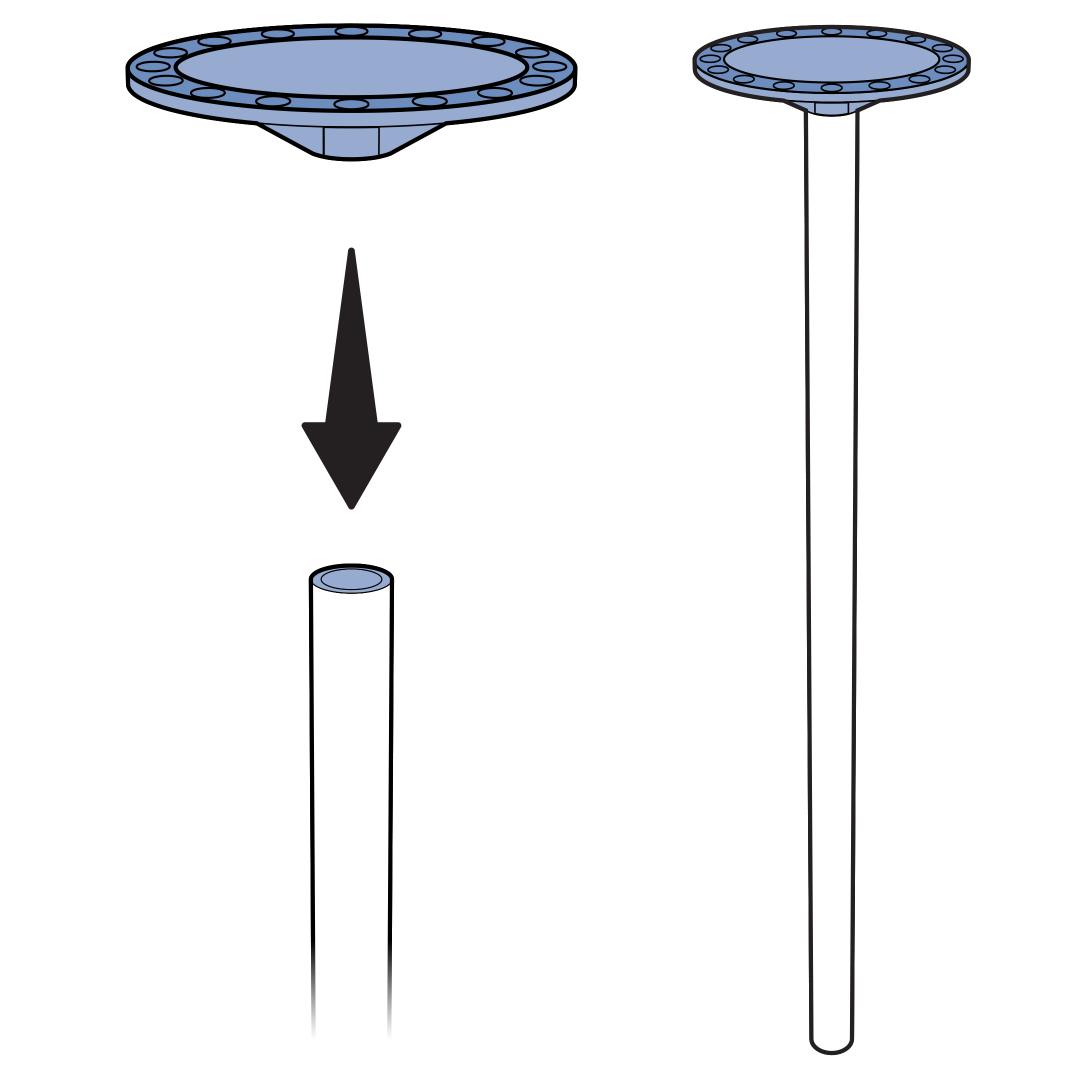
Screw a large wingnut onto the uncapped end of each threaded rod. Tightly twist a round cap on the same end of each threaded rod.
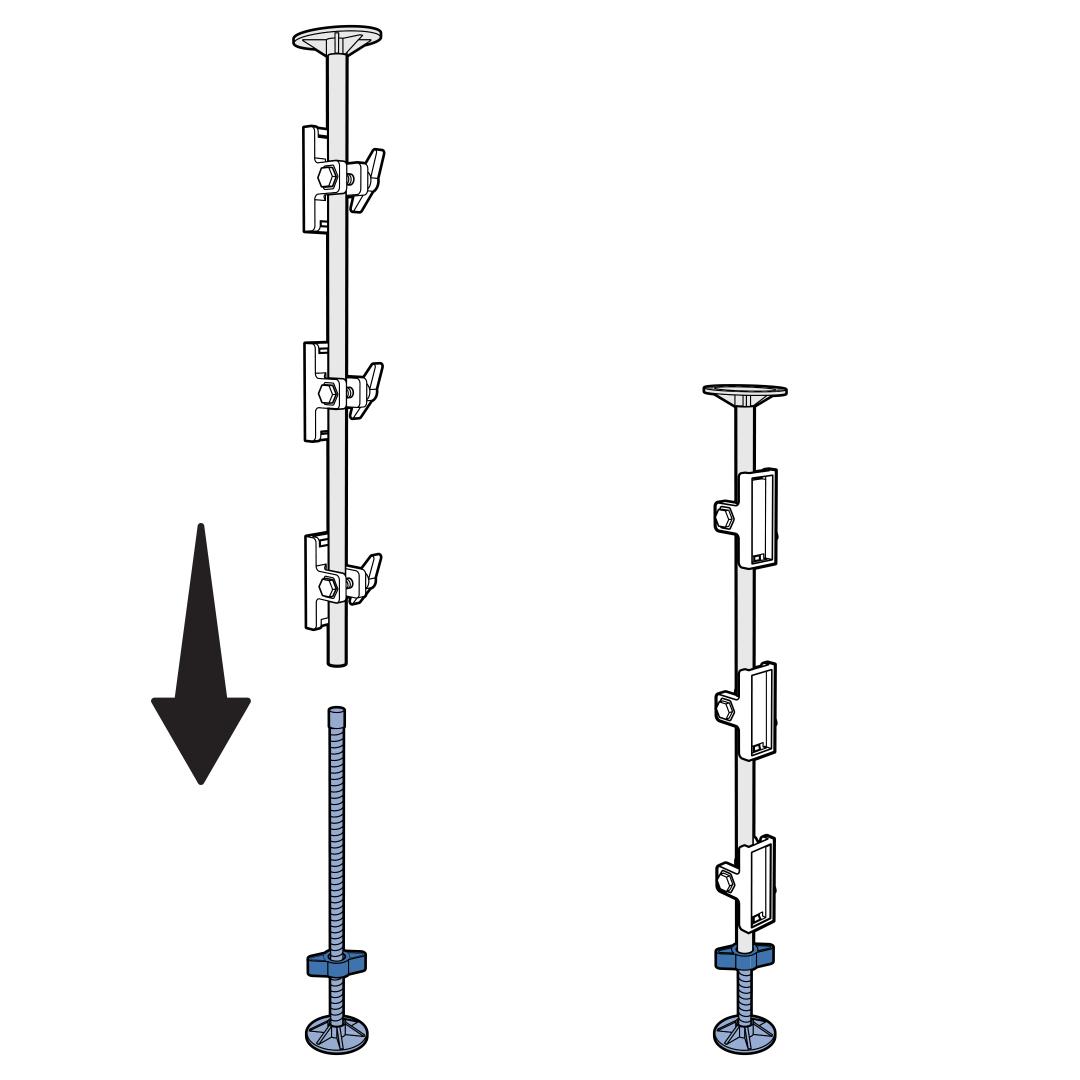
Insert a threaded rod into each hollow tube to form a pair of upright supports.
Assemble Oval Tube Barriers
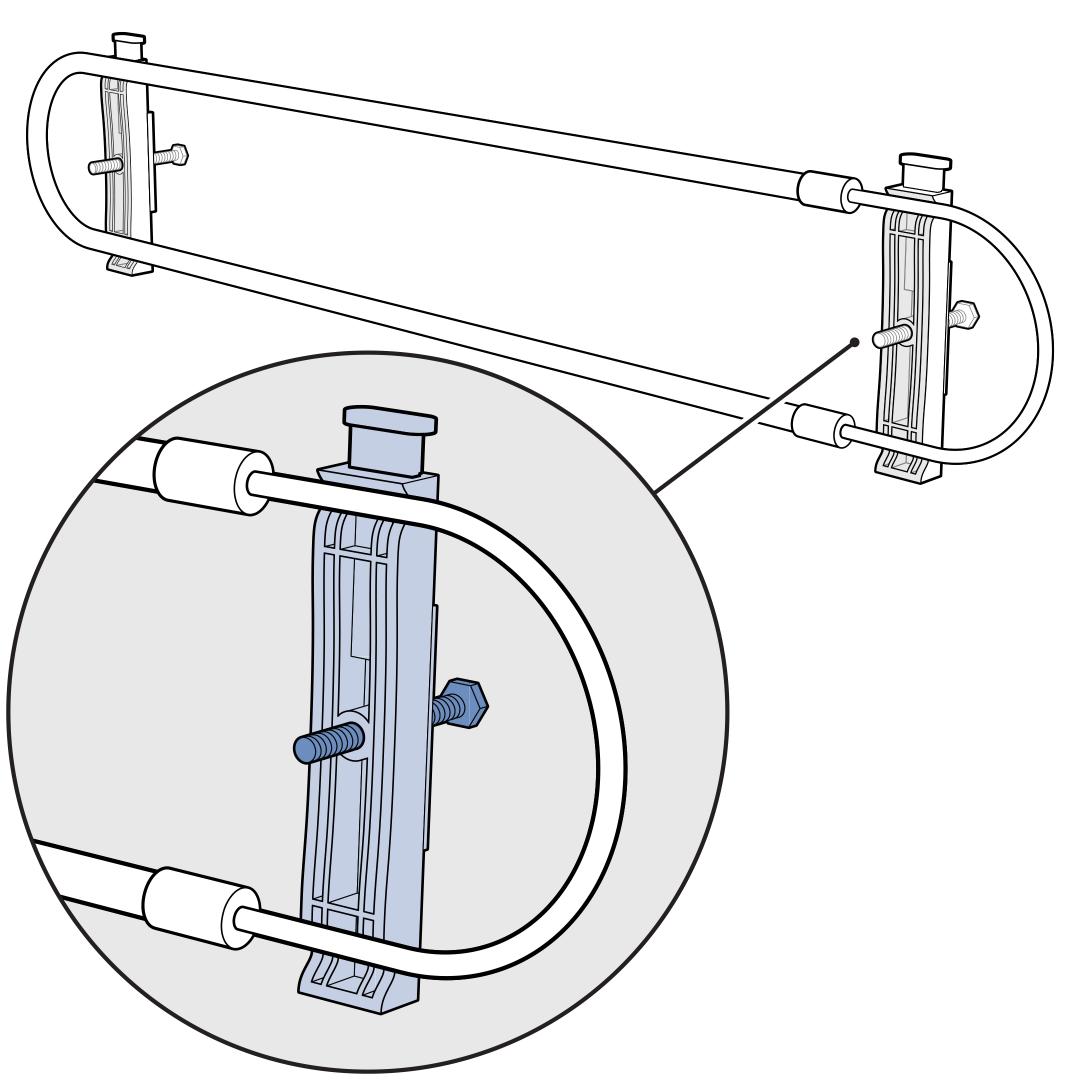
Insert a long bolt through each of the clamp halves with blue buttons. Fit the bolt head into the hexagonal hole. Position two of these clamp halves with the blue buttons facing the same direction. Then set an extendable oval tube across them. Make sure one clamp half is on the extendable (thinner) section of the oval tube. Repeat these steps with the remaining oval tubes and clamps.
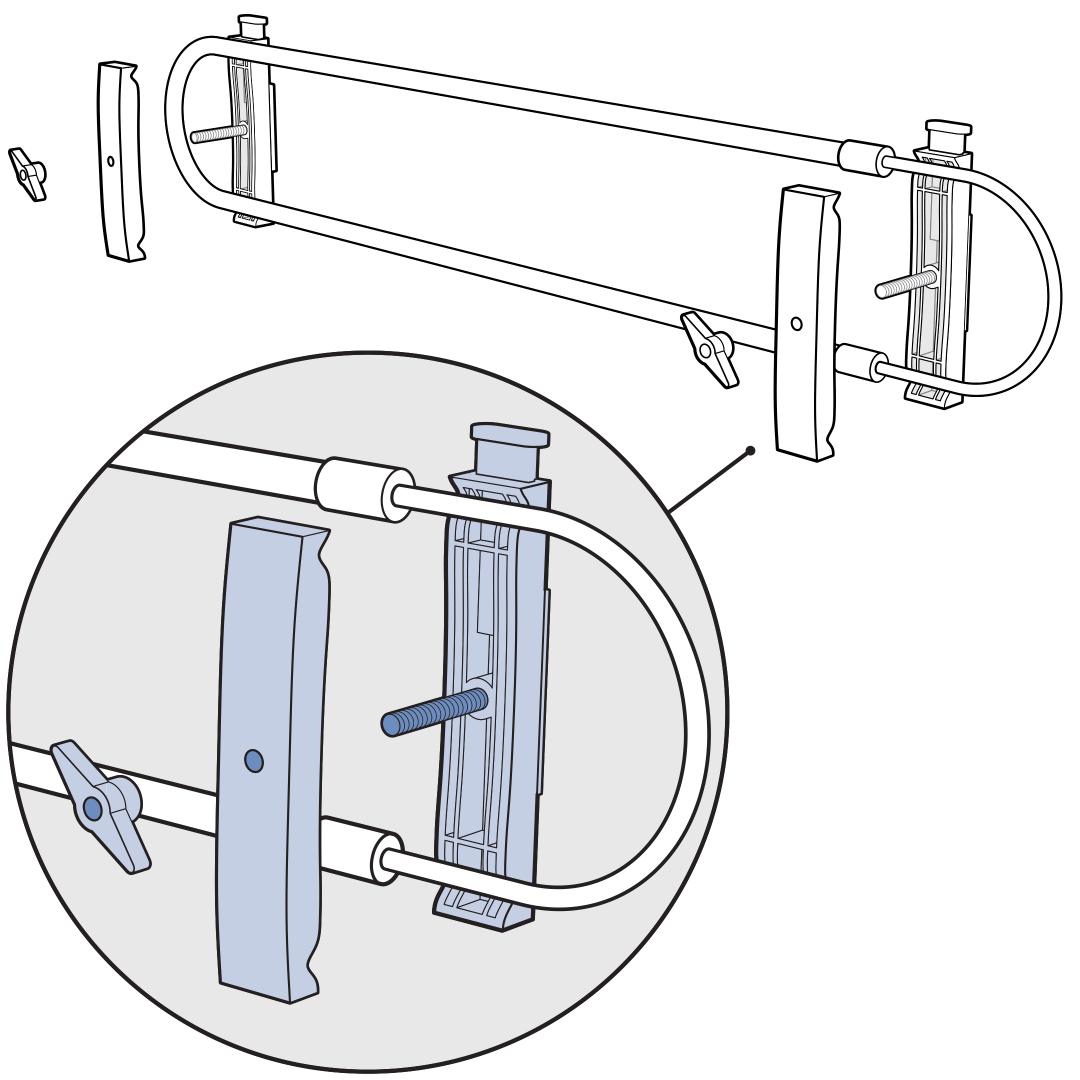
Set the other half of each clamp over the bolt and secure it with a small wing nut, leaving it loose to allow for adjustments later. Repeat these steps with the remaining oval tubes and clamps.
With all the pieces assembled, you can now install the barrier in your vehicle. For detailed instructions, visit our article How To Install the PetSafe® Happy Ride® Metal Dog Barrier in My Vehicle.