How To Install the Large Electronic Pet Door in a Wall
Important Information
Test the pet door in the location before you make any cuts or start installation.
- For the best installation experience, we recommend starting with our article on How to Prepare to Install the Electronic Pet Door in a Wall.
- Check for electrical and plumbing fixtures in the wall.
- An Electronic Pet Door Wall Conversion Kit will be needed for installation.
- Use proper safety equipment and guidelines while using any tools.
Measure and Mark
It is important to your pet’s well-being to measure and mark your pet’s shoulder height for proper installation placement. If there are multiple pets, use the tallest pet’s shoulder height measurement.
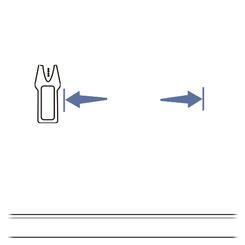
Decide where you would like to install the pet door. Use a stud finder to locate the studs in the wall and mark their location with a pencil.
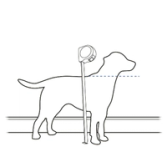
Measure and mark your pet’s shoulder height on the wall between the stud marks using either method:
- Have your pet stand next to the wall and mark their shoulder height.
- Use a measuring tape to measure your pet from the floor to their shoulder. Then apply that measurement to the wall.
Use a level to draw a horizontal line through the height marking to extend it.
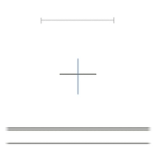
Locate the center point between the two stud markings. Use a level to draw a center vertical line through the shoulder height line.
Place the Template
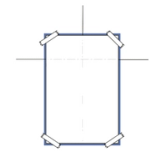
Use the cutting template for the Wall Entry Conversion Kit to precisely mark where the pet door will go.
- Cut out the template along the indicated line.
- Place on your wall, aligning the height and center lines marked to the ones on the template and tape in place.
- Use a level to confirm it is straight.
- Trace the template with a pencil, then remove from the wall.
Cut the Interior Pet Door Opening
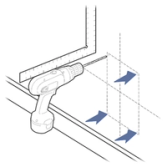
Drill holes inside each corner of the traced template using a 5/16 inch drill bit. Use a framing square to hold the drill steady and straight. Make sure that the drill goes through the exterior wall completely. The holes will be used as a guide for placing the template on the exterior wall.
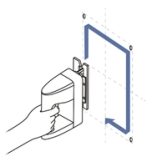
Place the jigsaw blade into a corner hole and cut along the drawn template lines. Continue cutting along the template until an opening is created.
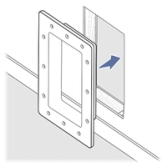
Insert the interior frame into the opening to check the fit. If the frame does not easily fit inside the opening, you may need to make adjustment cuts to the opening.
Cut the Exterior Pet Door Opening
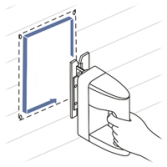
Align the template on the exterior wall with the drilled corner holes and trace, then remove the template. Place the jigsaw blade into a corner hole and cut along the drawn template lines. Continue cutting along the template lines until an opening is created.
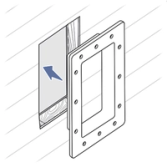
Insert the exterior frame into the opening to check the fit. If the frame does not easily fit inside the opening, you may need to make adjustment cuts to the opening.
Add Supports Within the Wall
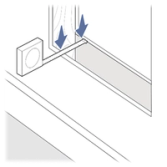
Measure the gap from the inside of outer wall to the inside of inner wall to determine the stud width needed. Then measure the width of the cut out.
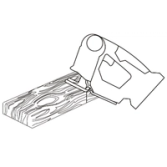
Cut a 2" x 4" or 2" x 6" piece to the width of the opening, making sure that the cut is square.
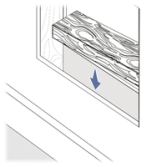
Remove any debris from the wall where the support will go. Place the piece of wood in the wall gap. Make sure the top of the wood support is flush with the bottom cut out of the wall and the support fits snugly.
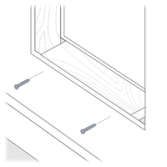
Fasten the wood support in place from the interior wall with two decking screws, making sure the support stays flush with the cutout.
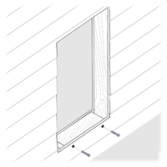
Fasten the wood support in place from the exterior with two decking screws. If placing screws into vinyl siding it may be necessary to drill a hole through the siding slightly larger than the heads of the screws. This will allow the screws to tighten flush with plywood and not buckle the vinyl siding.
Install the pet Door Frame and Extension Tunnel
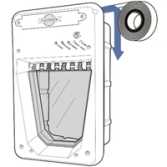
Insert the interior pet door frame into the lip of the Tunnel Extension. Then tape the seam between the Tunnel Extension to the pet door frame.
Insert the exterior frame that came with the extension tunnel, into the exterior cutout. Make sure the frame is straight and level before inserting any screws. Tape the frame in place or have someone hold it.
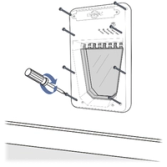
Insert the interior frame and tunnel into the wall. Secure with eight Phillips head wood screws.
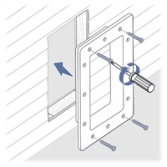
Secure the exterior frame with four Phillips head wood screws, one in each corner. Additional tools or hardware may be needed depending on the exterior material.
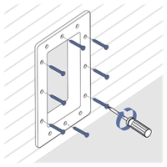
Use the additional eight screws to make sure that the door is flush against the wall.
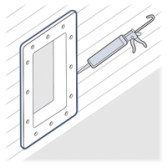
Fill in any gaps between the wall and the frame with caulk.
Important: Do not over tighten any of the screws on the frame.
Contact Customer Care
If you need further assistance, please contact our customer care team.