How To Install the PetSafe® Happy Ride® Metal Dog Barrier in My Vehicle
Important Information
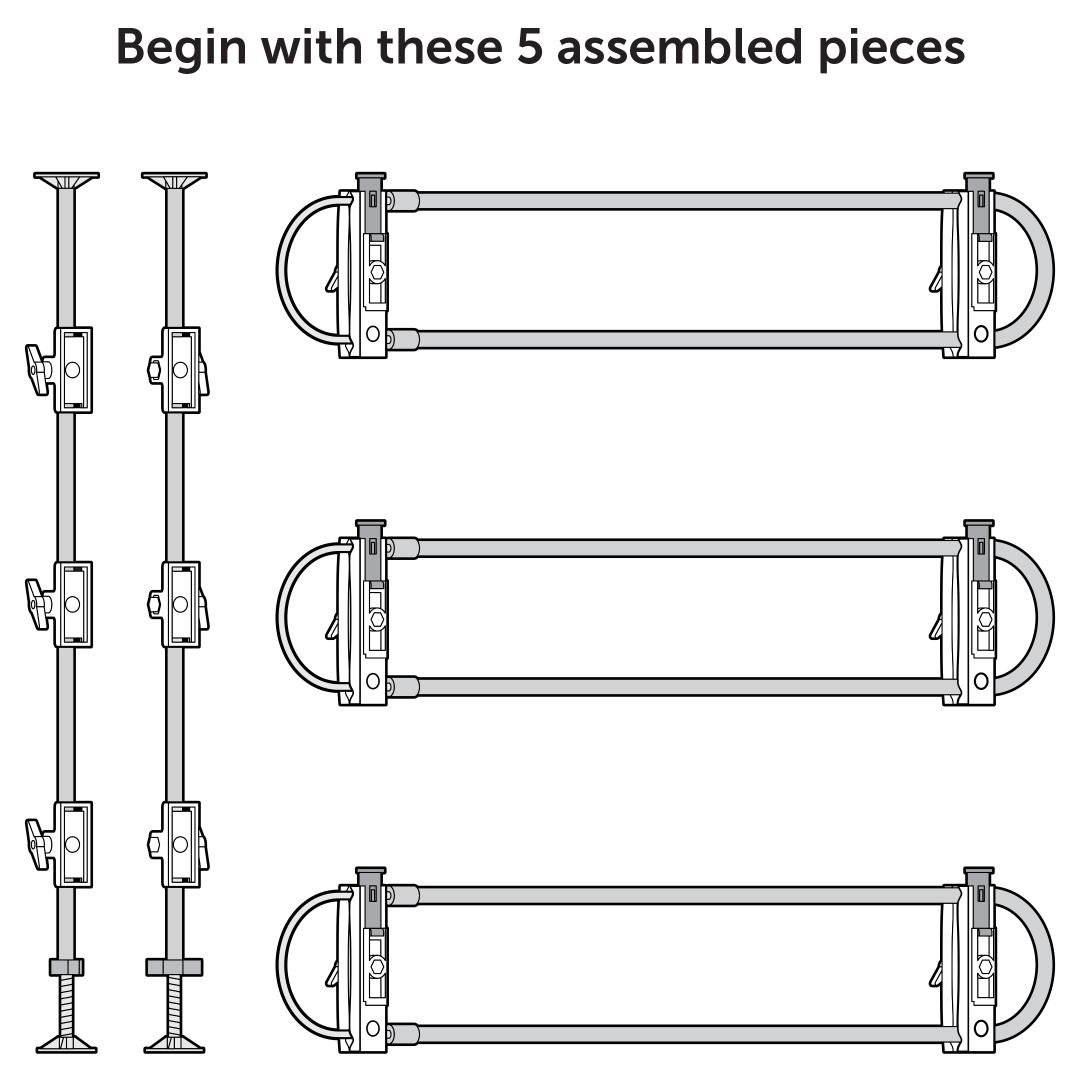
If you are installing the barrier for the first time, ensure you have each section assembled first. The assembled sections include:
- Two support rods with attached caps and mounting brackets
- Three oval tubes with attached clamps
For detailed instructions, visit our article How To Assemble My PetSafe® Happy Ride® Metal Dog Barrier.
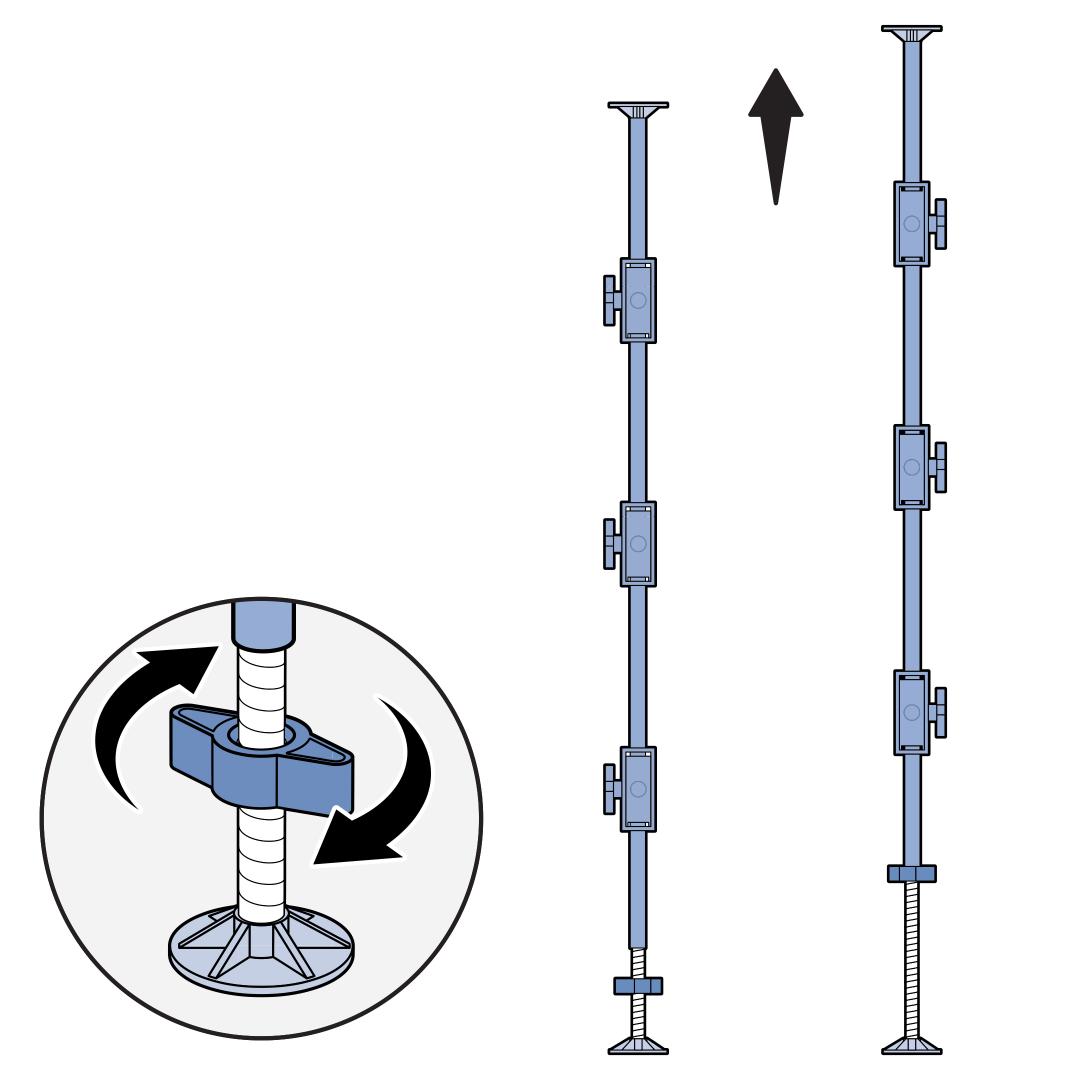
In the back of your car, stand the support rods up with the round caps on the floor. Rotate the large wingnuts until the oval cap is pressed firmly against the ceiling. Space evenly across the width of your vehicle. Both upright supports should now stand securely on their own.
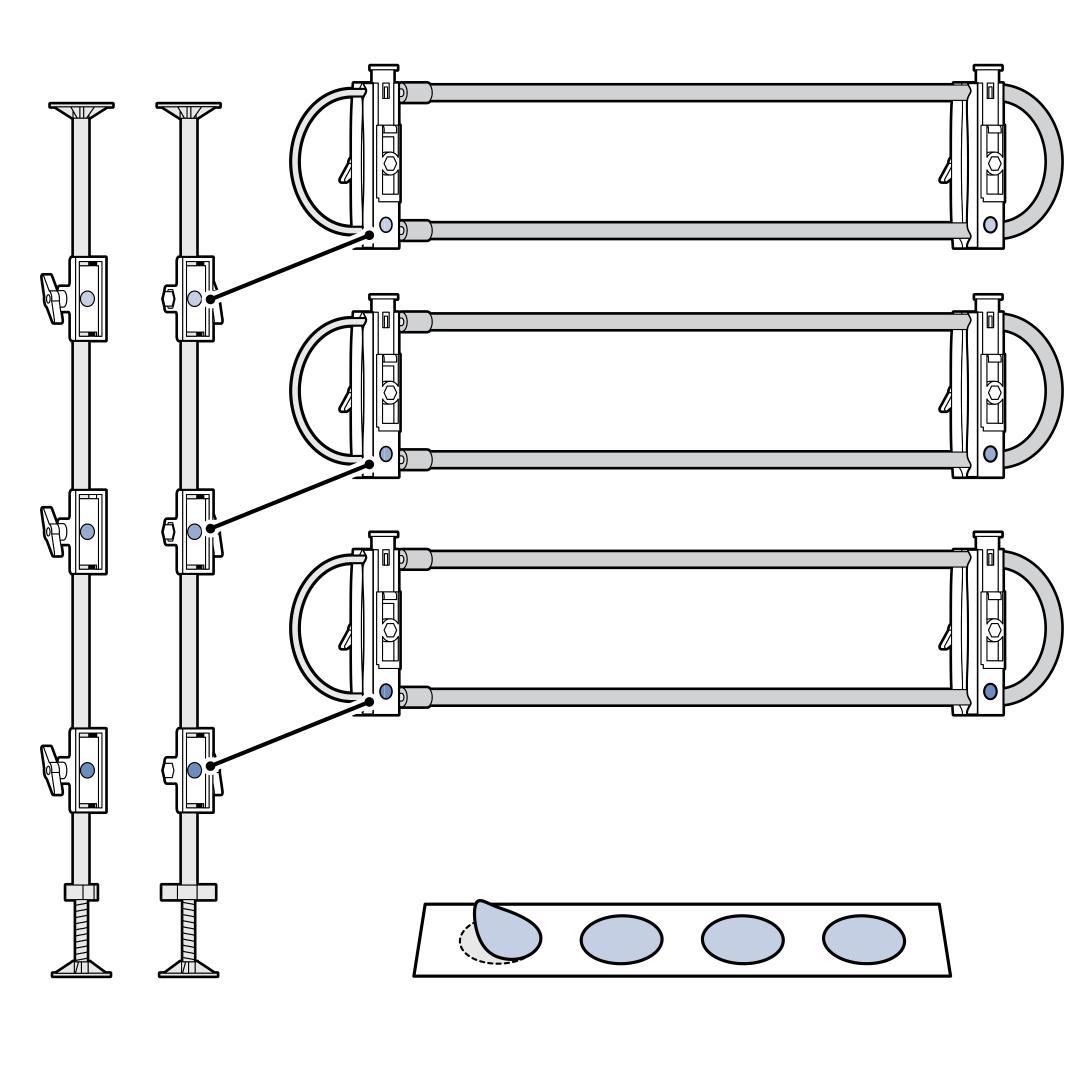
Adjust the mounting brackets so the flat rectangular slots all face you. For each set of mounting brackets and clamps, use the provided stickers to label which tube belongs to which mounting bracket to make setup quick and easy each time.
Mount each tube onto the corresponding support rod. On the clamps of one oval tube press and hold the blue buttons, slide the clamps onto the rectangular slots, then release the buttons. Repeat for each oval tube.
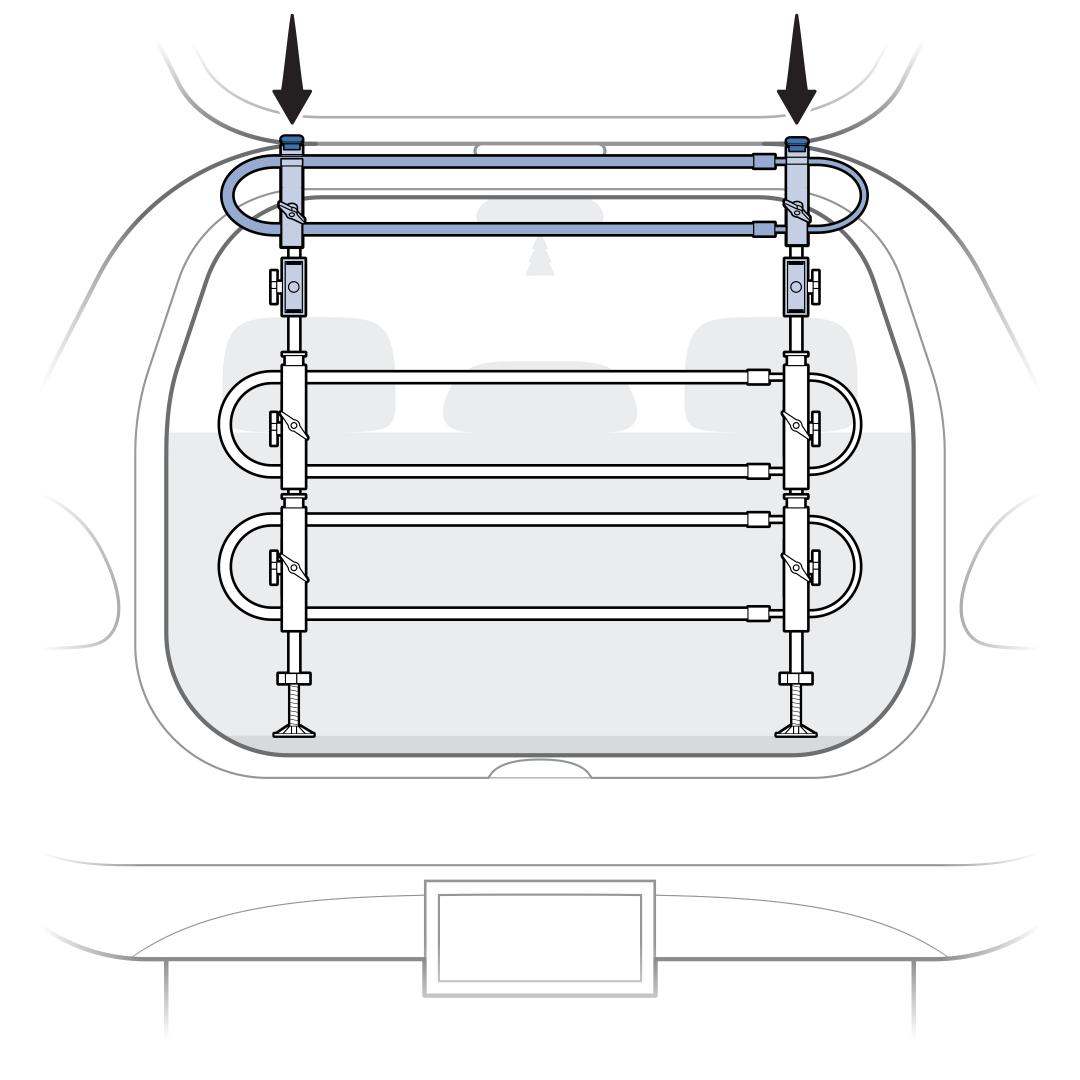
Adjust the Barrier
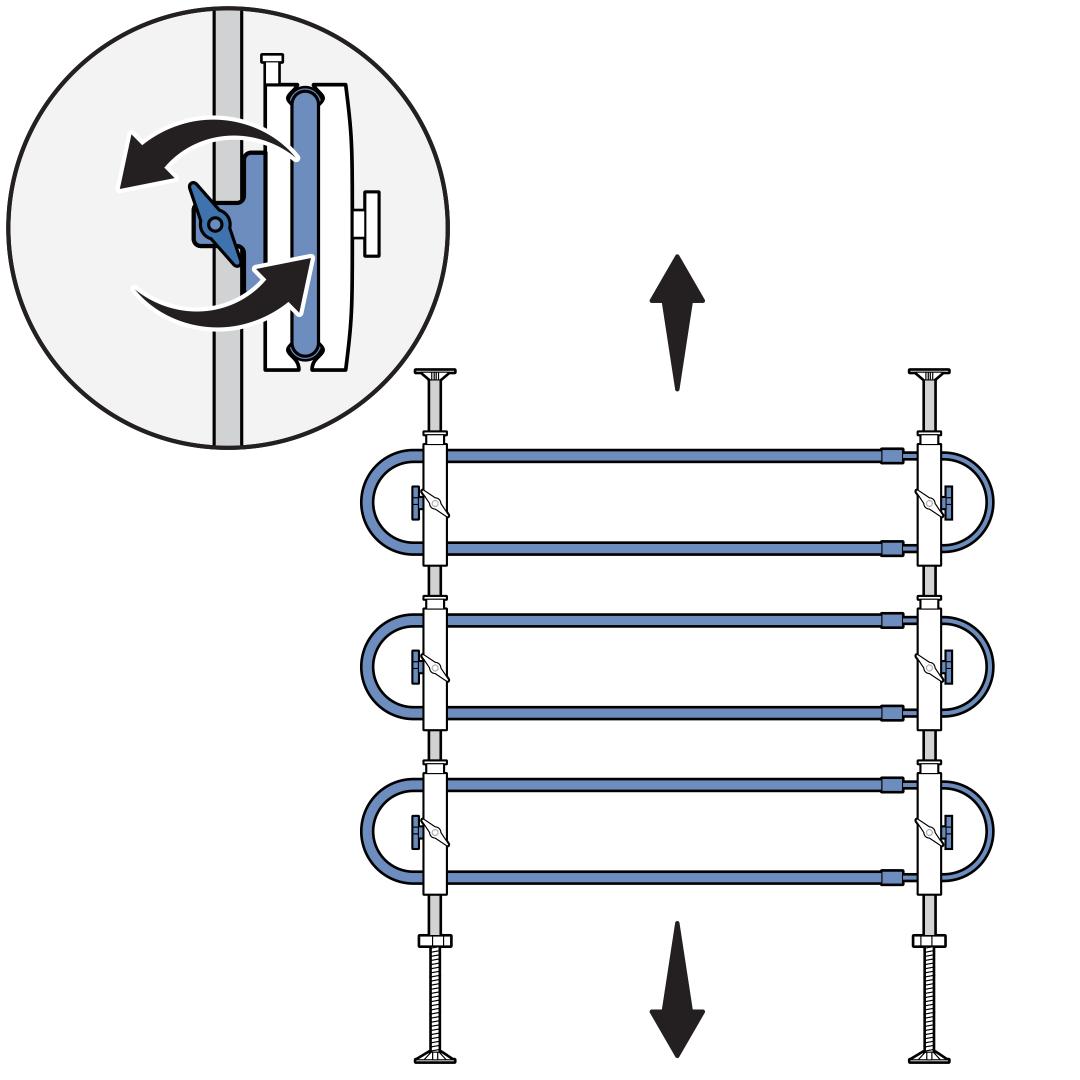
Adjust the height of each oval tube by loosening the wingnut on the mounting brackets and sliding the tubes up or down. Tighten the wingnut when the tubes are in the desired position.
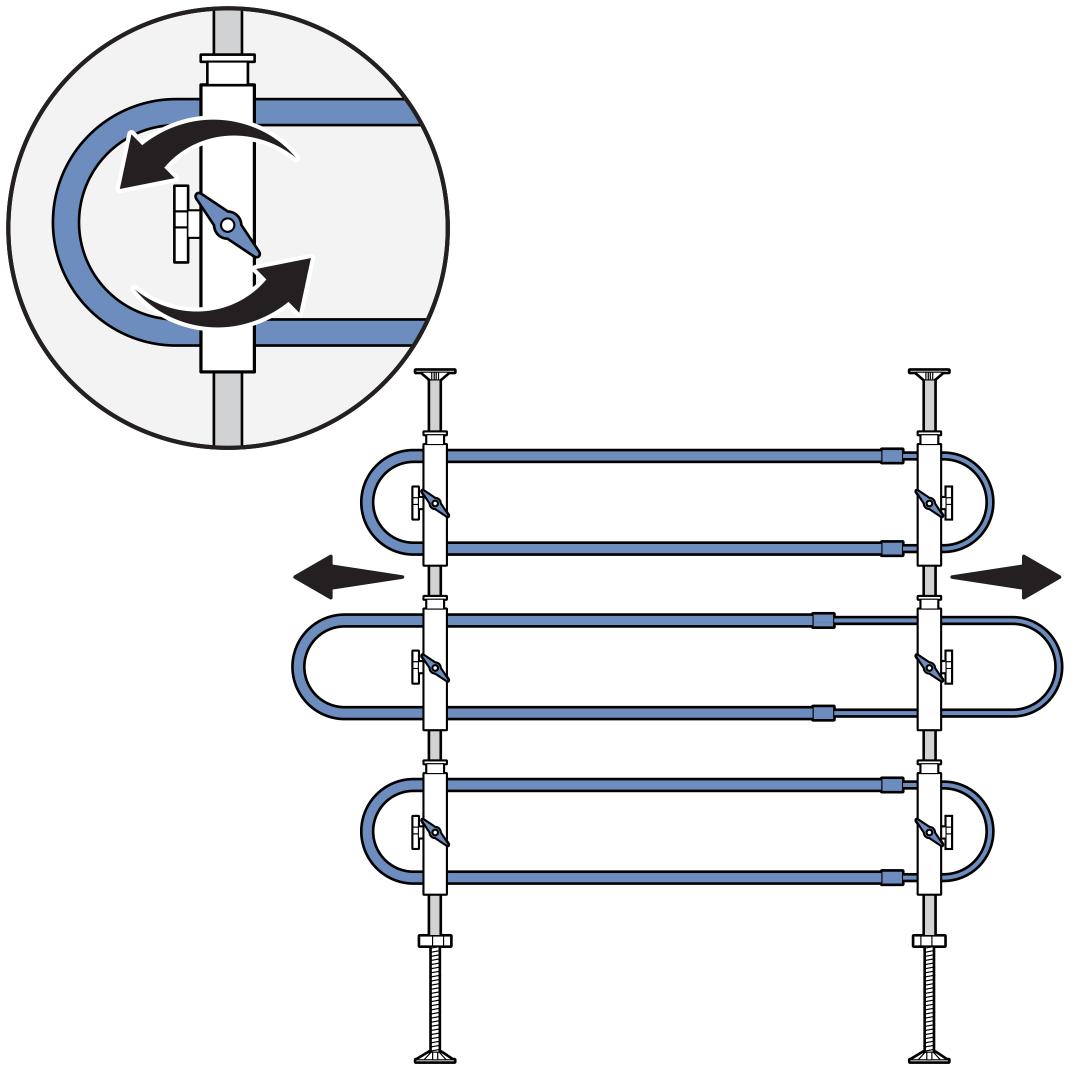
Adjust the width of each tube on either or both sides by loosening the wingnut on the clamps and moving left or right. Tighten the wingnuts when the tubes are in the desired position.