How to Install the PetSafe® Sliding Glass Pet Door – 1 Piece
Important Information
For homes with security systems, contact your provider before installation. Sensors may need to be moved to avoid interference.
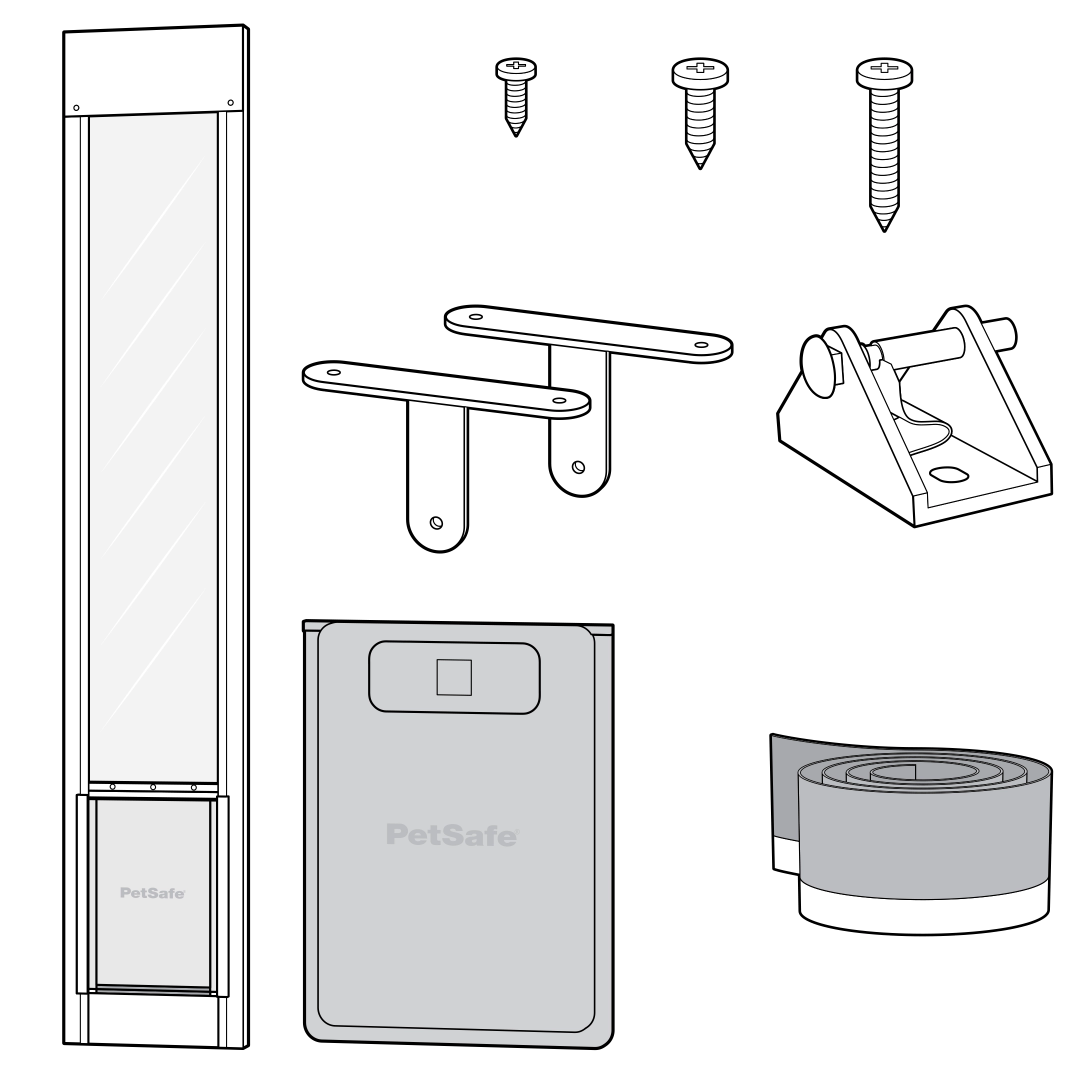
What is Included:
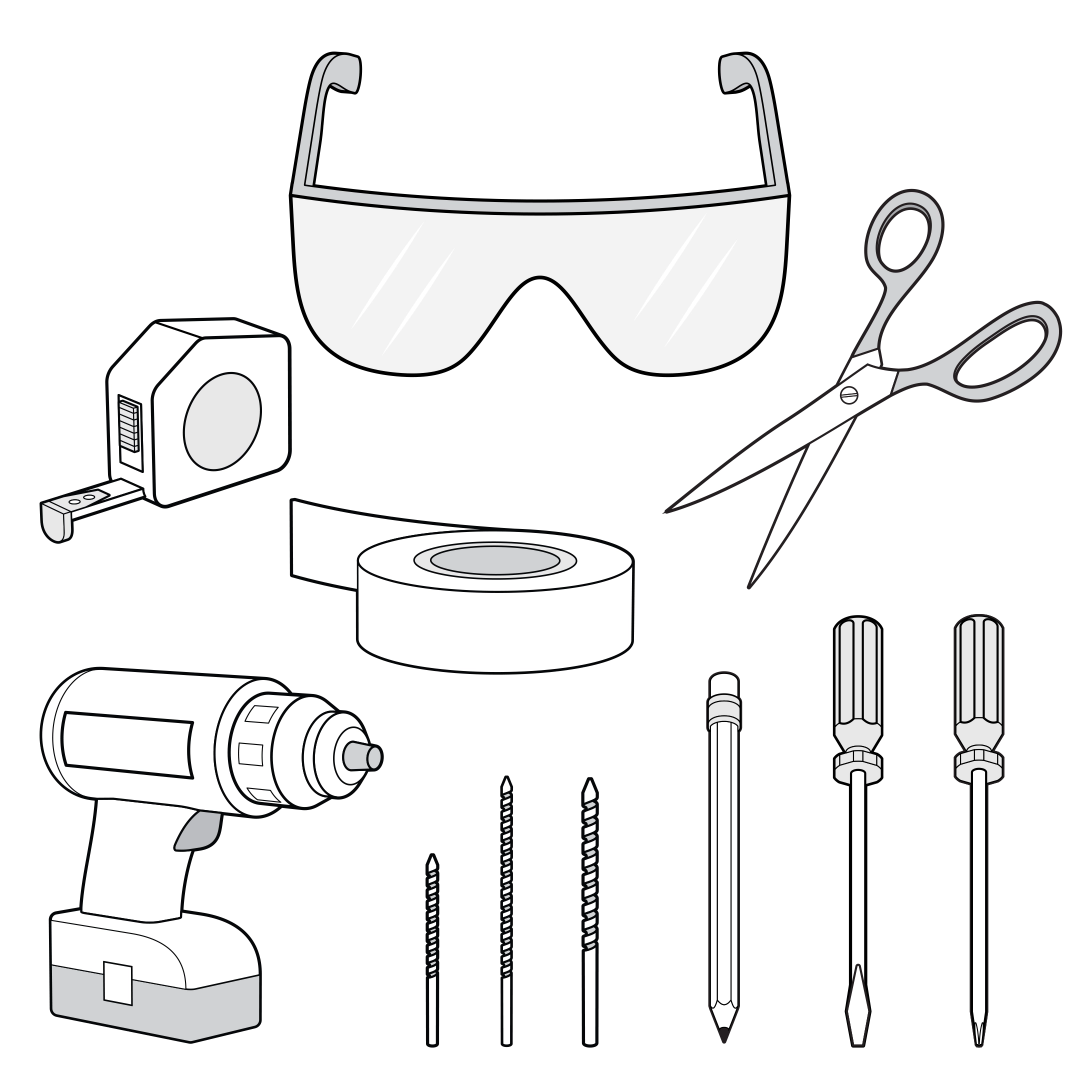
Tools You Will Need:
Assemble the Pet Door Panel
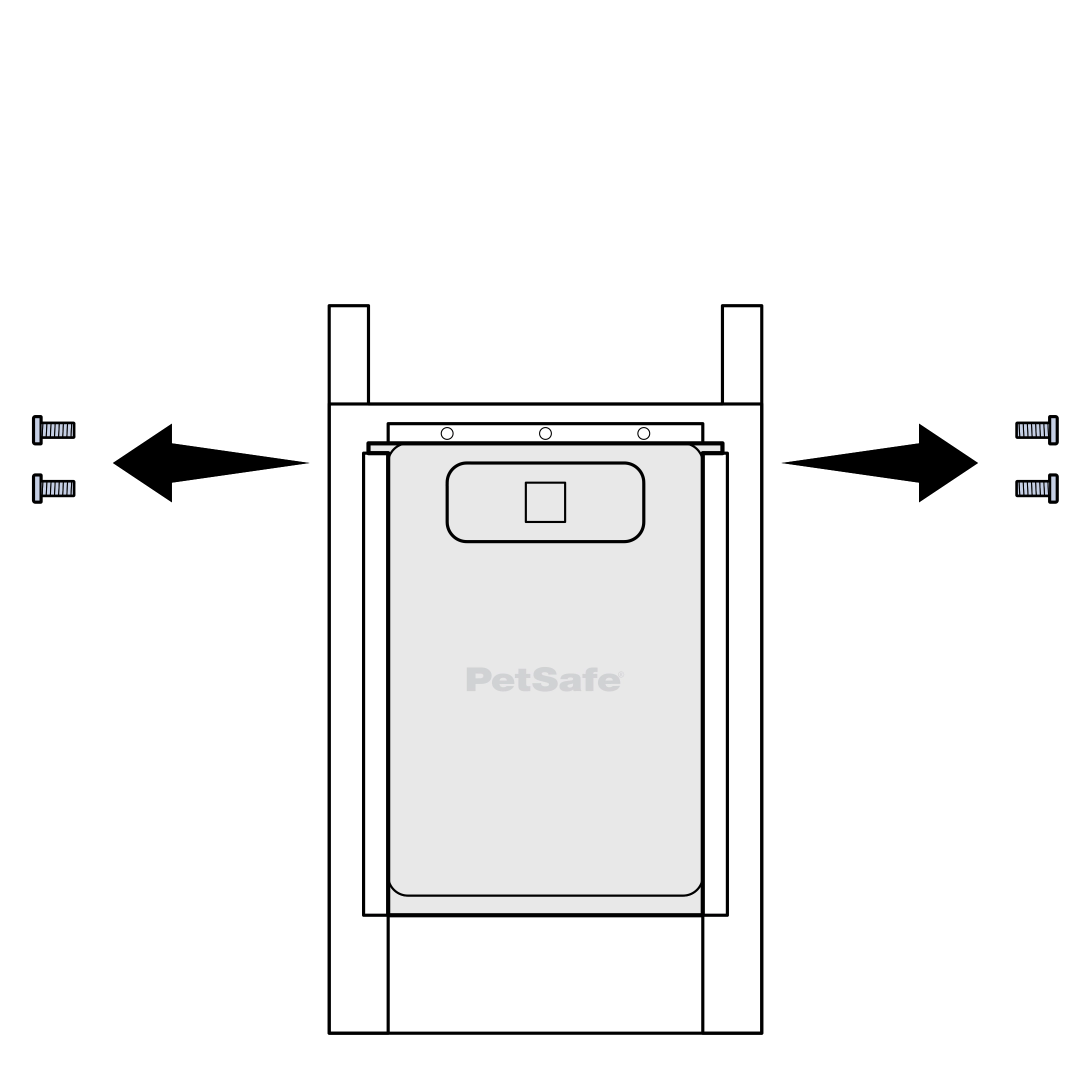
If you purchased a 96” Patio Panel, first assemble the bottom section to the top section before proceeding with the installation. Remove the four factory-installed screws from sides of connection bars on bottom door section.
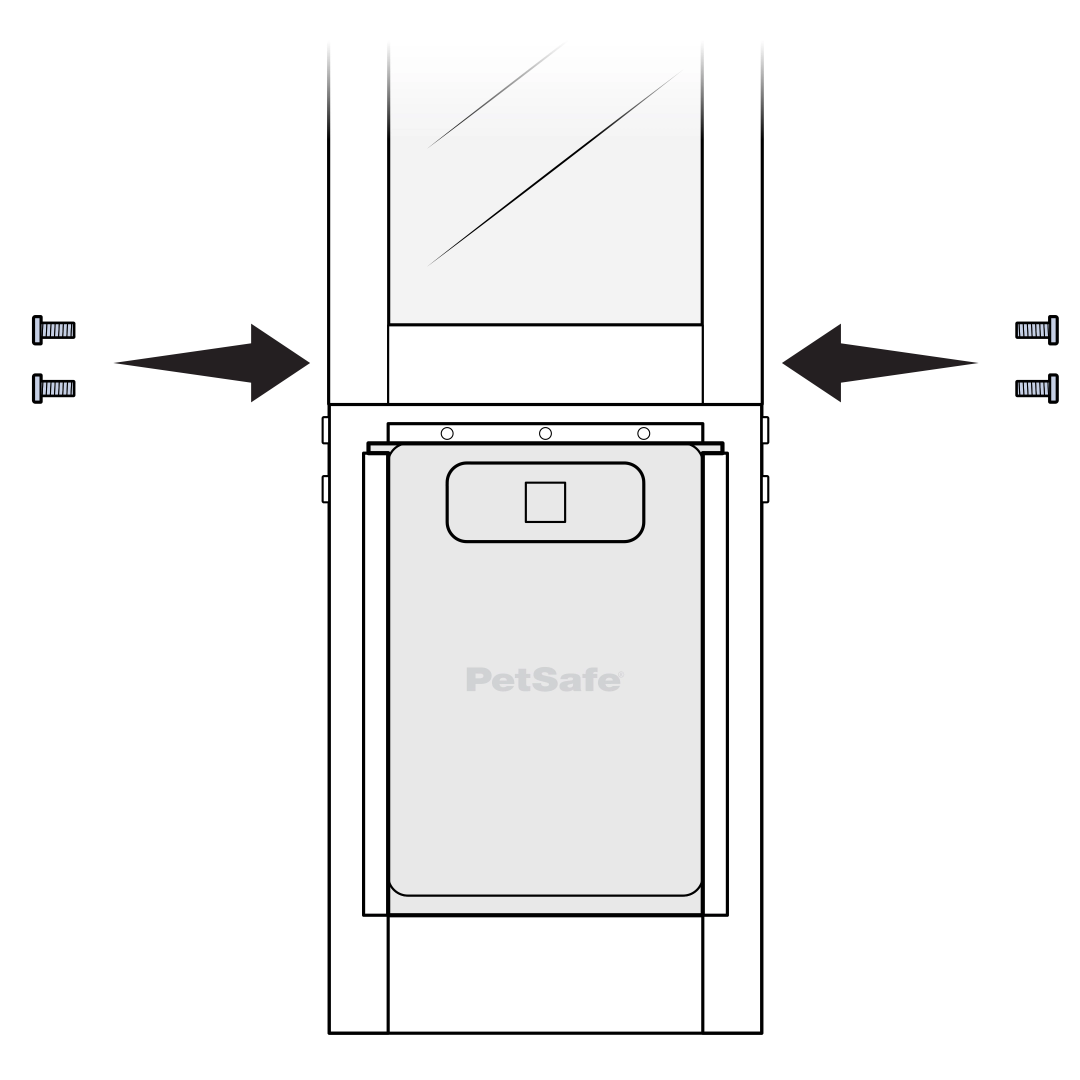
Slide the top panel onto the connecting bars. Using a manual flathead screwdriver, secure with two short flat screws on each side and tighten until resistance is felt.
Do not overtighten. Overtightening can warp the pet door frame.
Insert the Pet Door Panel
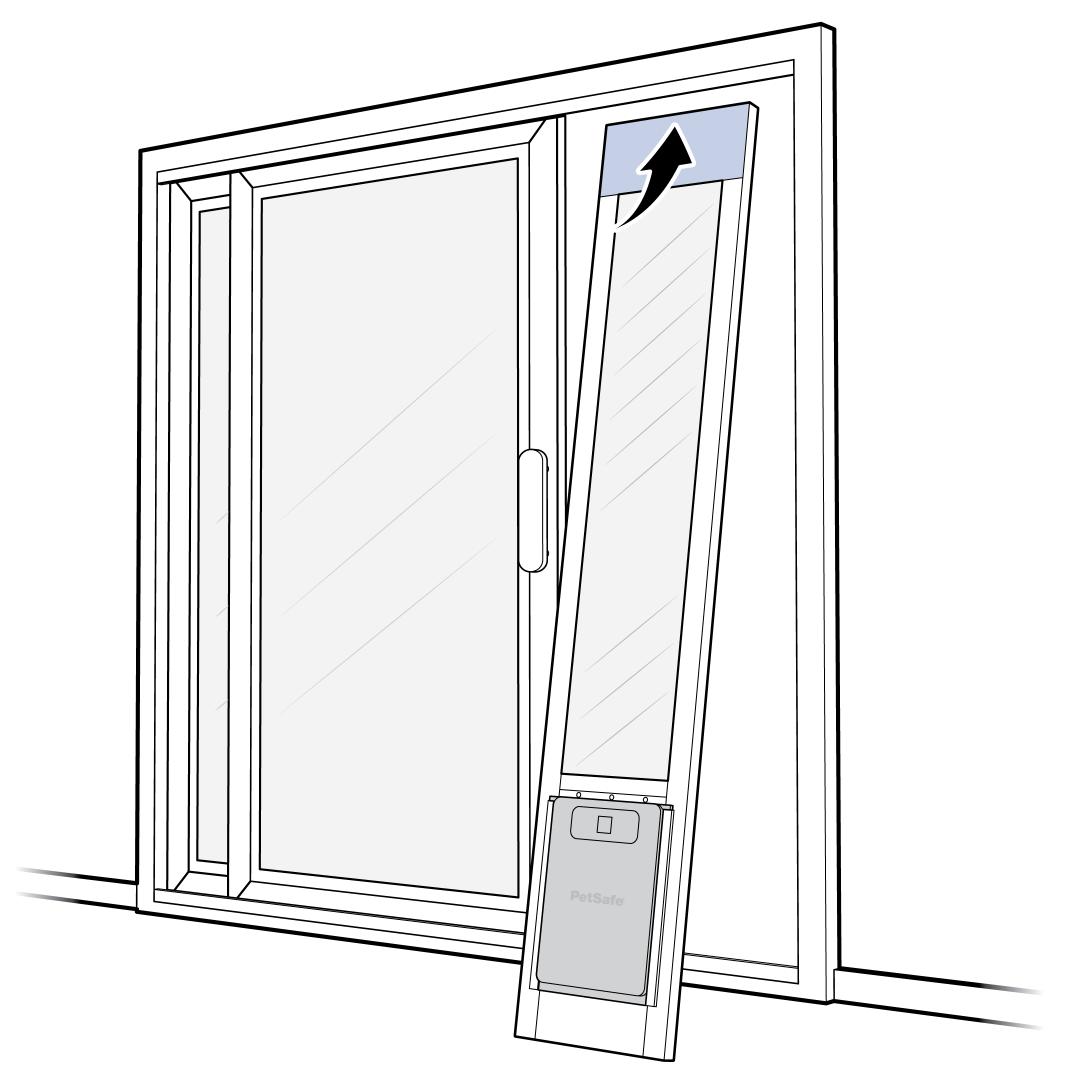
Remove the cardboard inserts from under the height adjuster. With the sliding door opened, insert the pet door panel into the interior side upper door track of the sliding glass door.
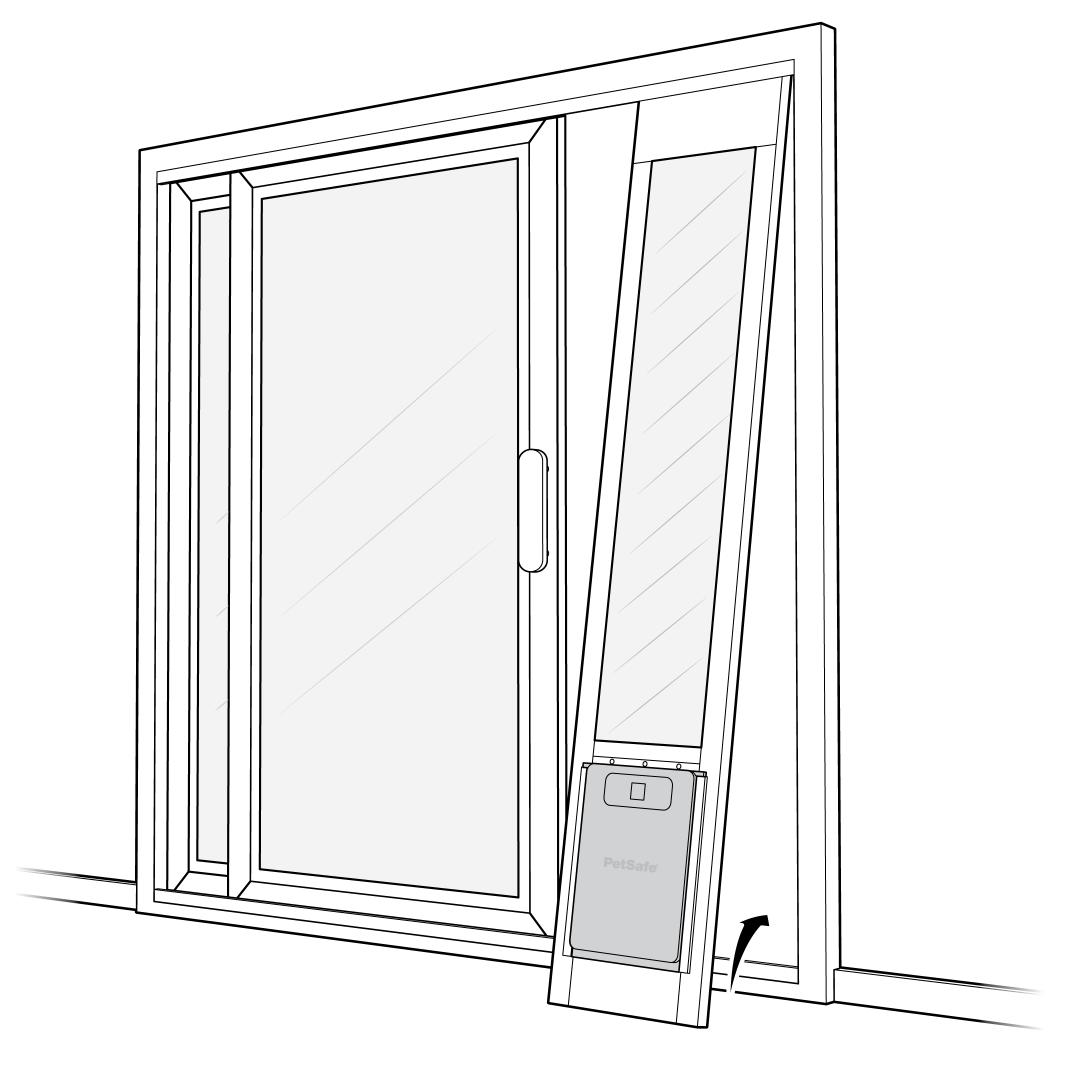
Ensure the side of the patio panel with the flap screw heads visible is facing to the interior Press up to compress the spring-loaded height adjuster, then lift the bottom of the pet door panel into the lower door track.
Secure the Height Adjuster
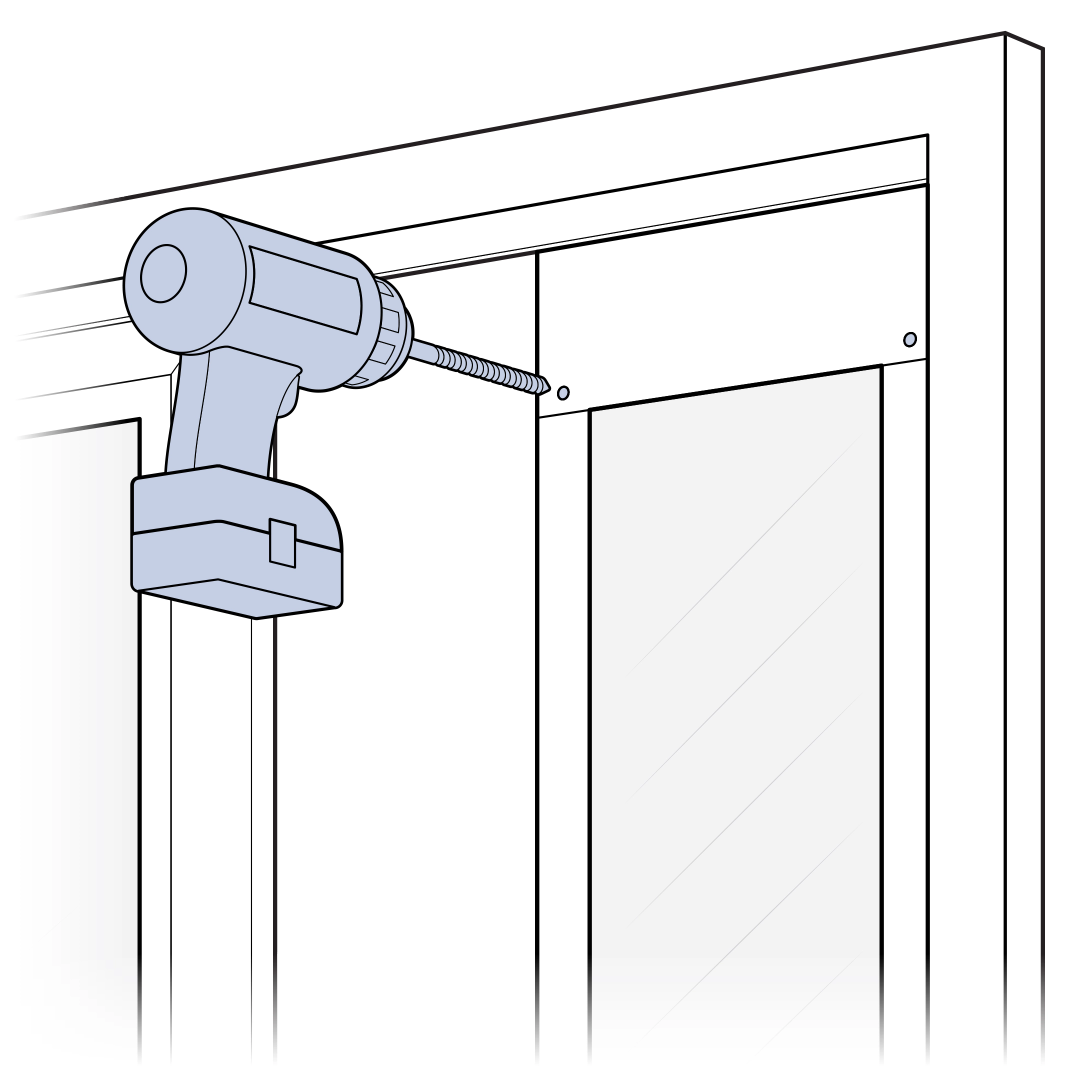
Make sure the height adjuster is fully extended and not tilted to one side. Ensure both the top and bottom of the panel are properly seated in the track.
Drill through both pre-drilled holes on the height adjuster using the ⁷⁄₆₄ inch drill bit.
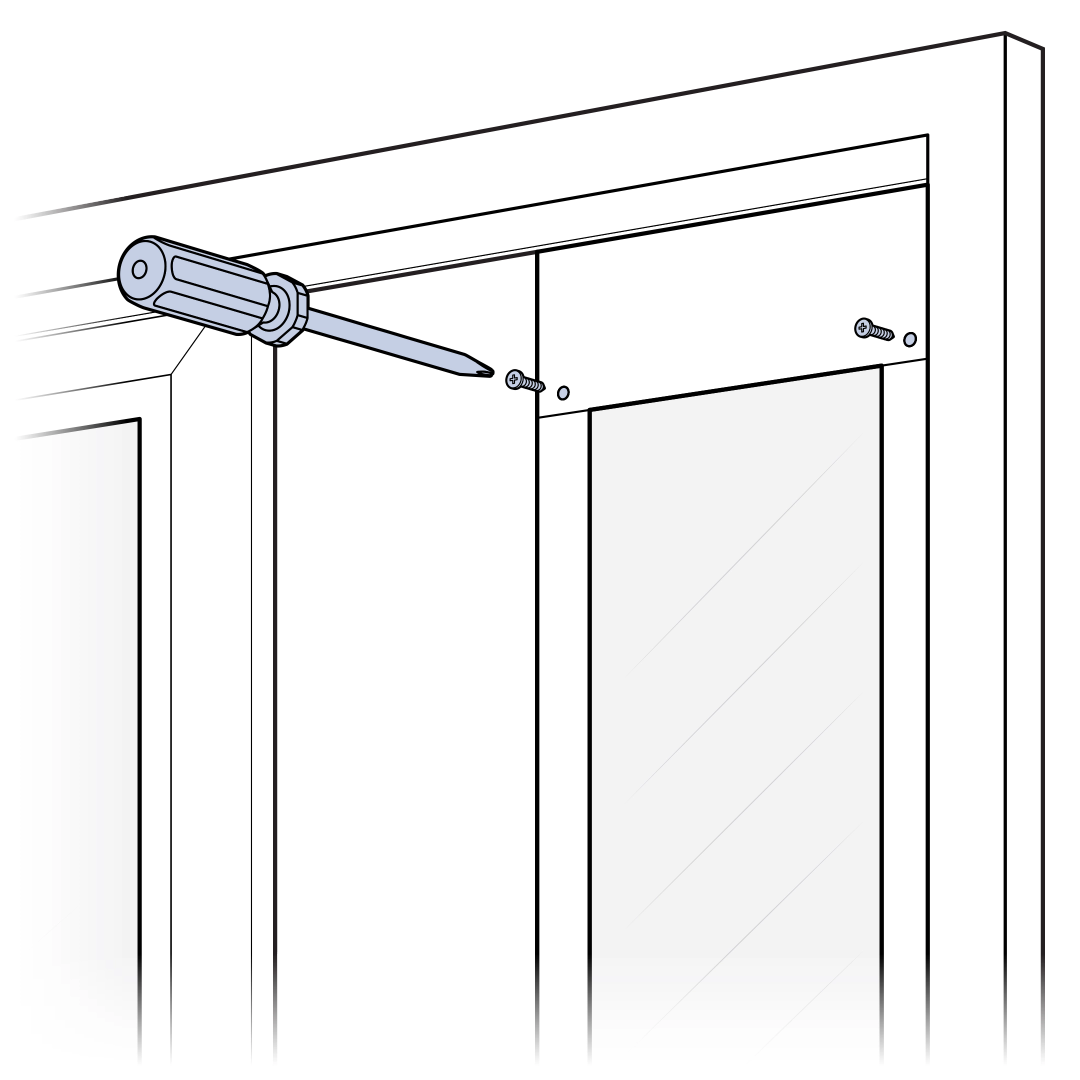
Secure the height adjuster in place using two #6 ½ inch screws with a Phillips screwdriver. Slide the pet door panel back against door jamb. Make sure it is flush without any gaps.
Secure the Pet Door Panel
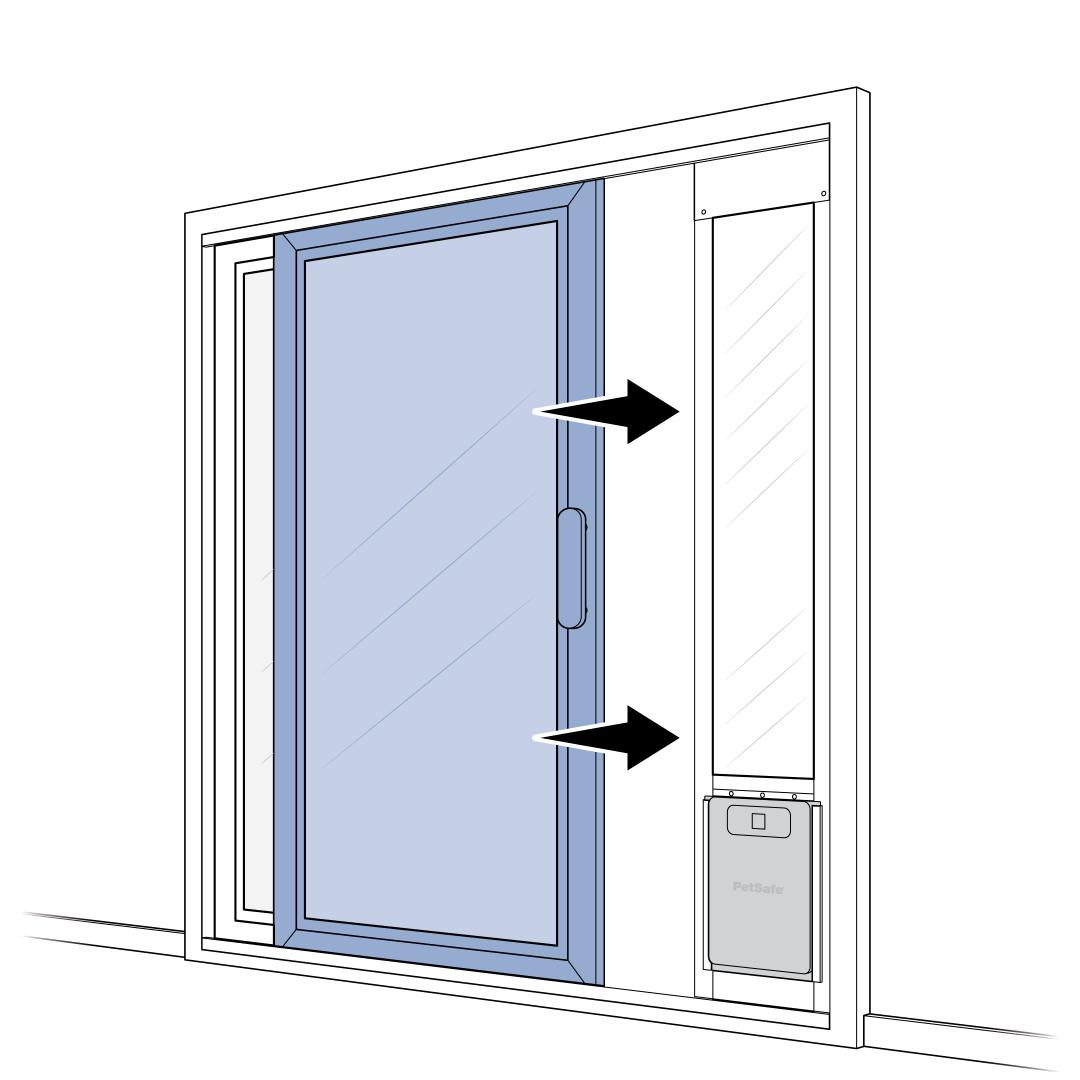
Push the pet door panel flush against the edge of the sliding glass door frame. There should be no gaps between the pet door panel and the edge of the sliding glass door frame. Close the sliding glass door on the panel.
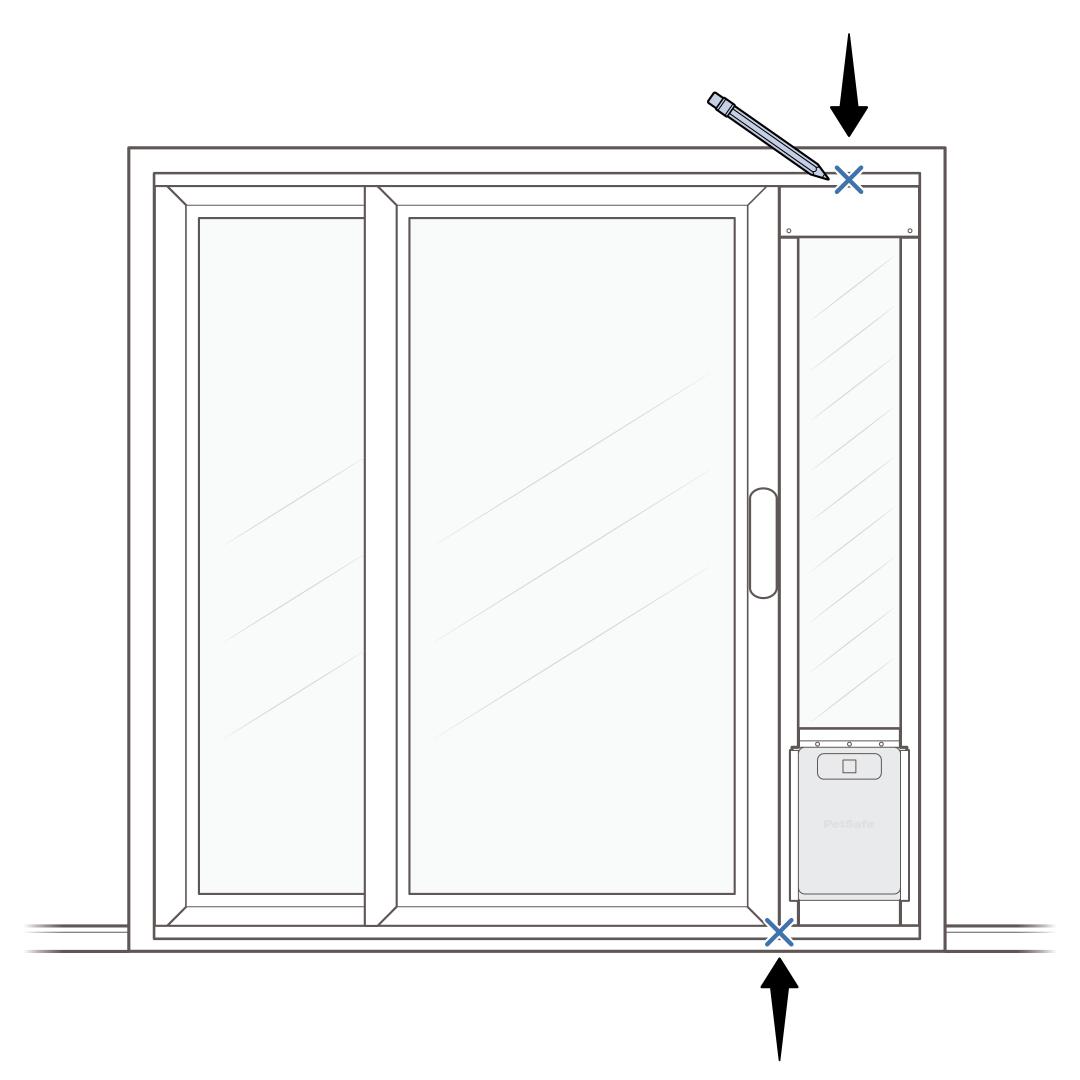
On the doorframe, measure and mark the top center of pet door panel. Then mark at the bottom, the side of the pet door panel where the sliding door will close against.
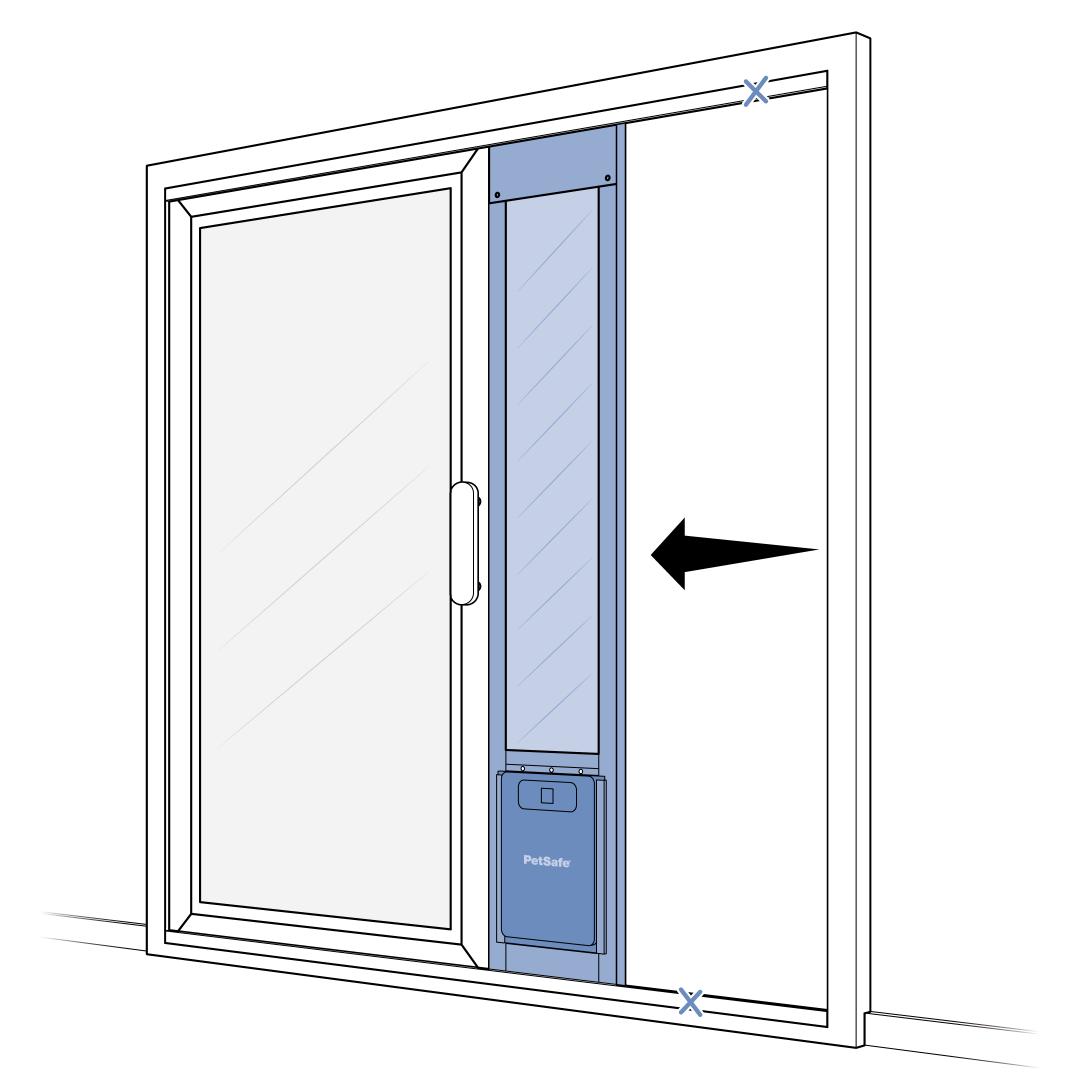
Slide open the door completely, then slide the pet door panel flush against the open sliding door.
Install the T-brackets. They can be installed with adhesive for a tool-free and temporary option, or with screws for a secure and more permanent option.
Attach the T-brackets with Screws
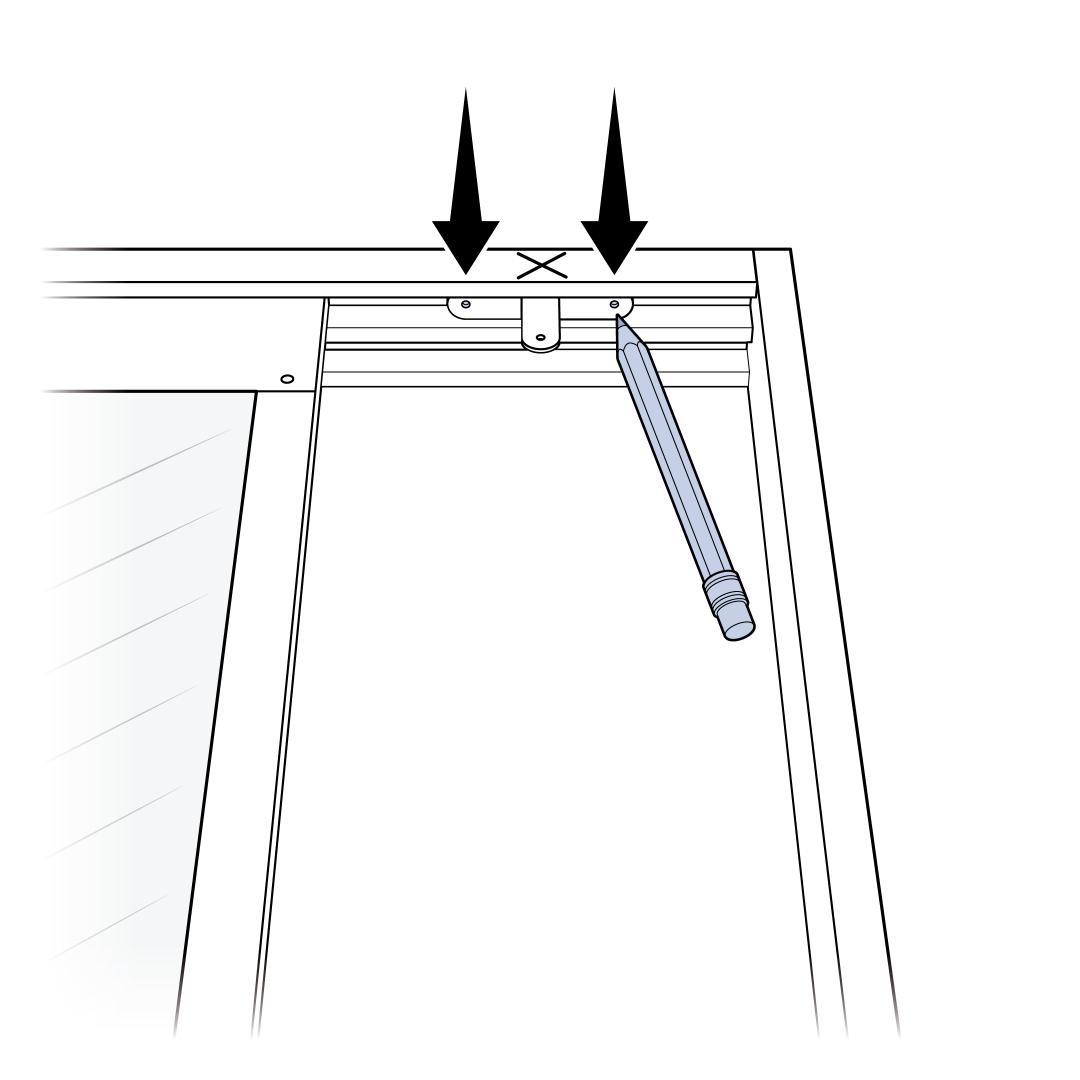
Open the sliding glass door and slide the pet door panel over far enough to clear all the marks. Take one of the T-brackets and place at the top of the sliding glass track where the vertical part of the bracket is closest to you and aligns with your mark. Mark the bracket holes with a pencil on the inside of the track.
Do the same for the T-bracket at the bottom but position the vertical part of the T-bracket so your mark aligns with the edgeof the T-bracket that is closest to the sliding door.
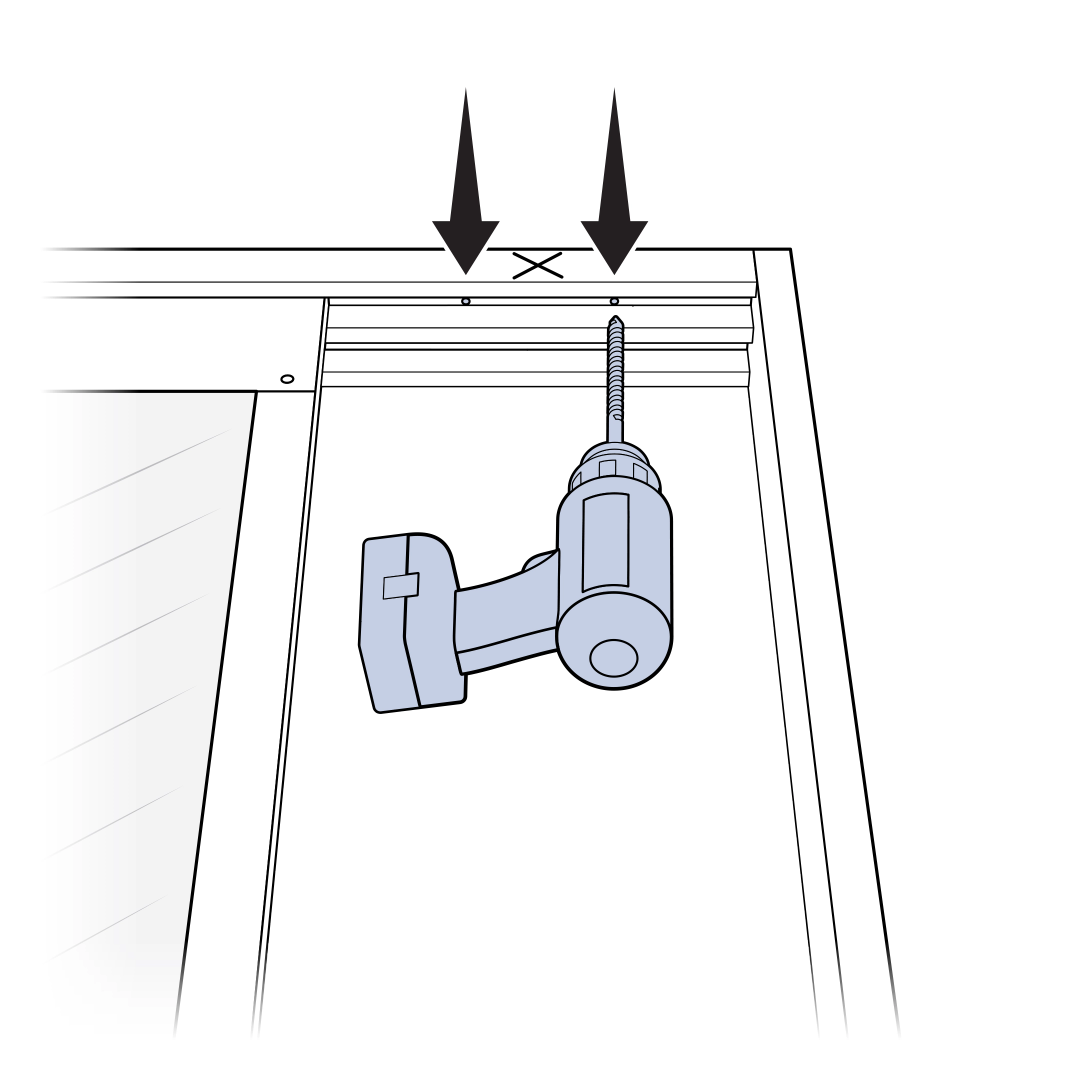
Use a ⁷⁄₆₄” (2.5 mm) drill bit to drill pilot holes for T-brackets at the top and bottom of the sliding glass door track. Place the T-brackets back into place on the track and secure into place with the four M4 x 10 mm sheet metal screws.
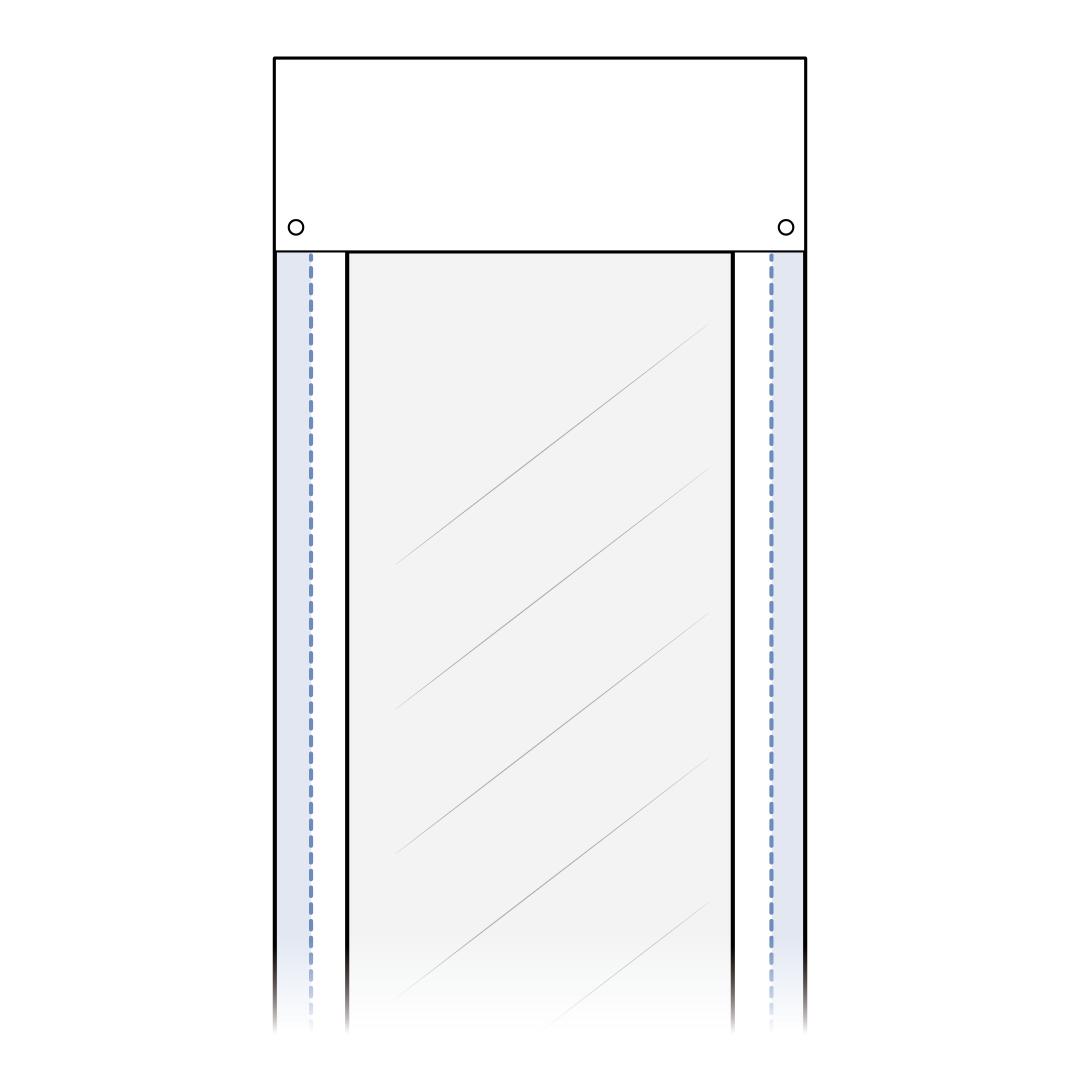
Before drilling into the pet door panel, it is important not to drill inside the panel rib lines where the glass is located. Only drill into outer edge section. Slide the pet door panel over, adjusting the placement to ensure the holes you just drilled in the frame are over the outer edge of the pet door panel where drilling is safe.
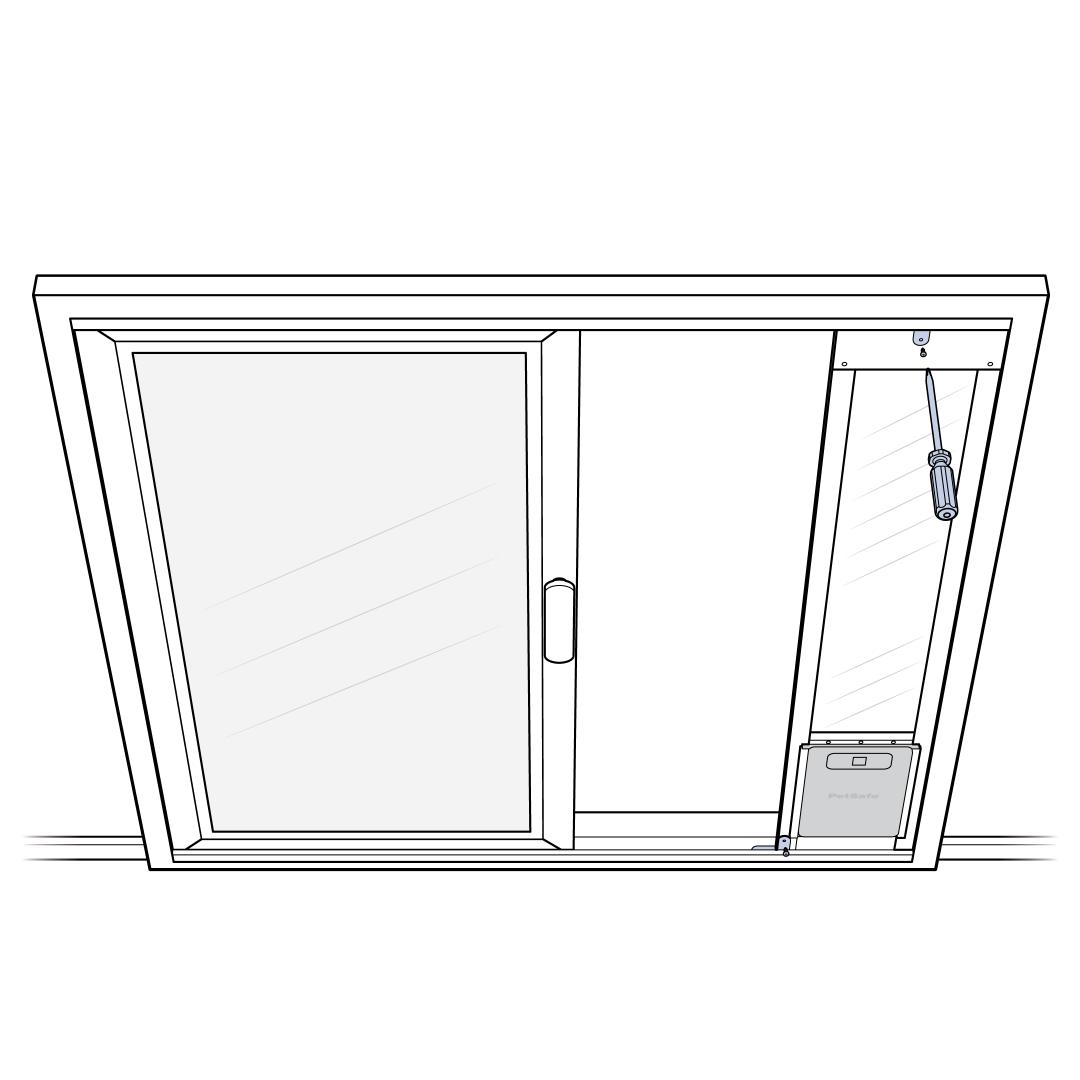
Use a ⁷⁄₆₄” (2.5 mm) drill bit to drill pilot holes through T-brackets and into the pet door panel at the top and bottom. Attach the T-brackets to the patio panel with two M4 x 10mm sheet metal screws.
Attach the T-brackets with Adhesive
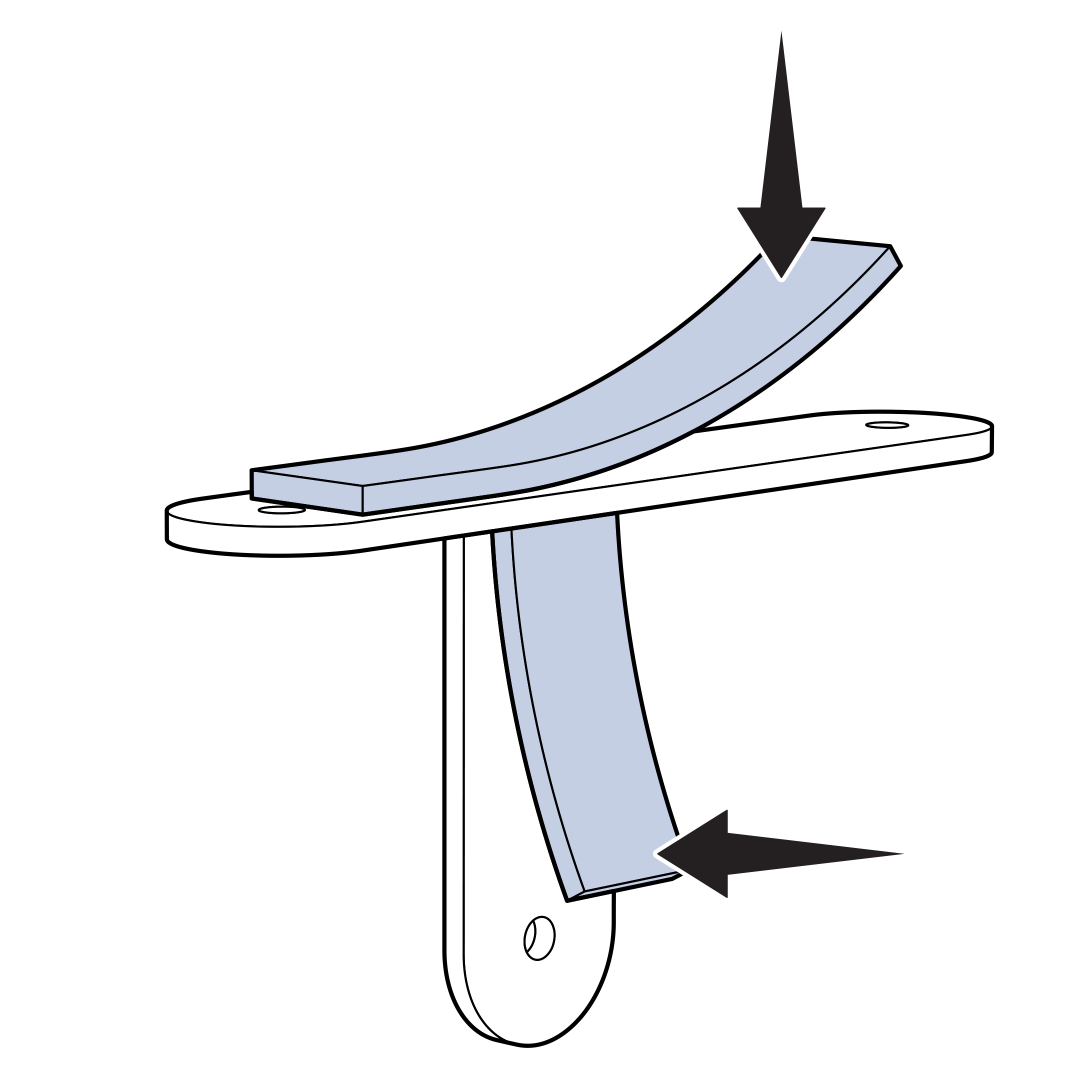
Clean the back of both T-brackets with rubbing alcohol and let dry. Then apply the adhesive strip to the top and inside of the bracket.
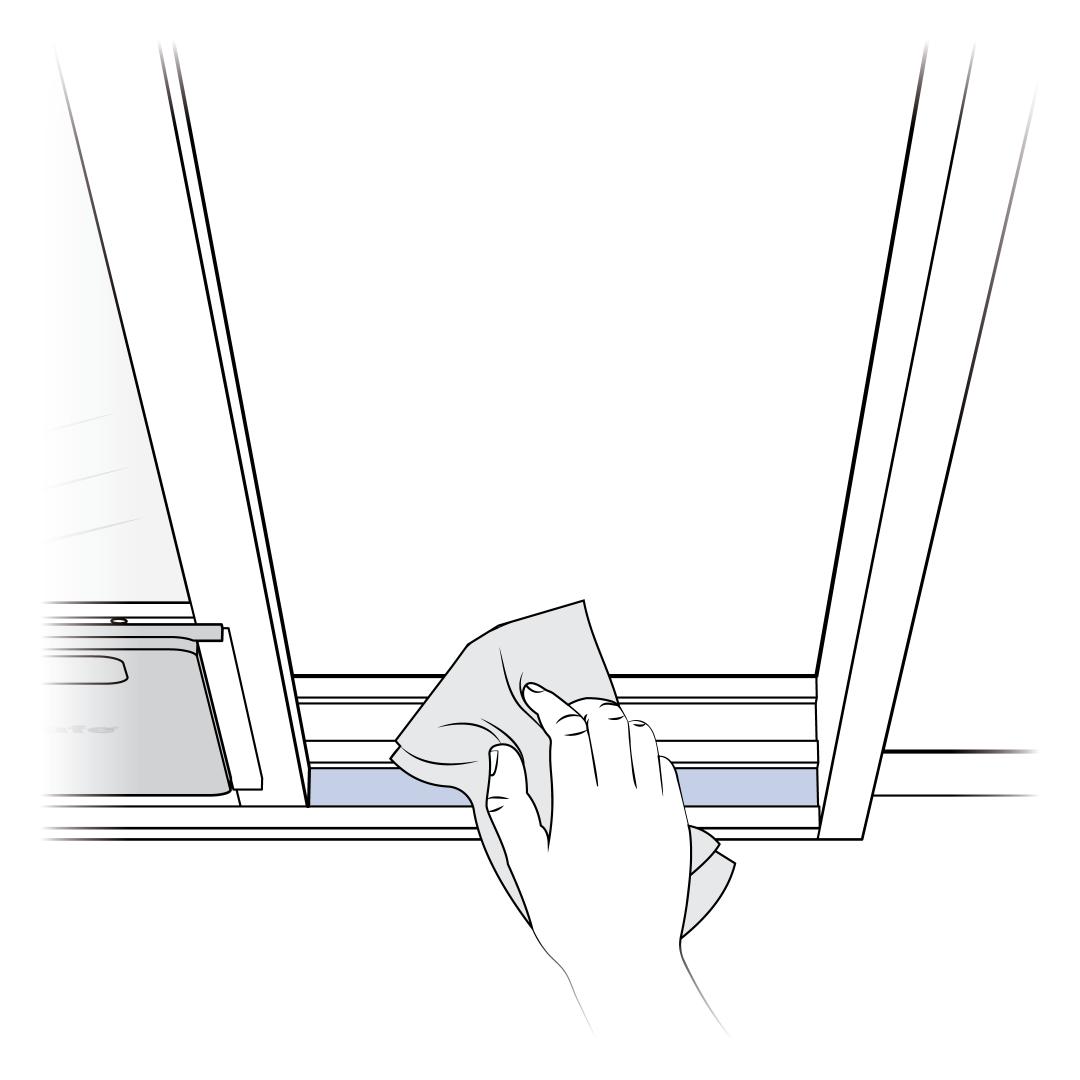
Clean the upper and lower sliding tracks near the mark and let dry completely.
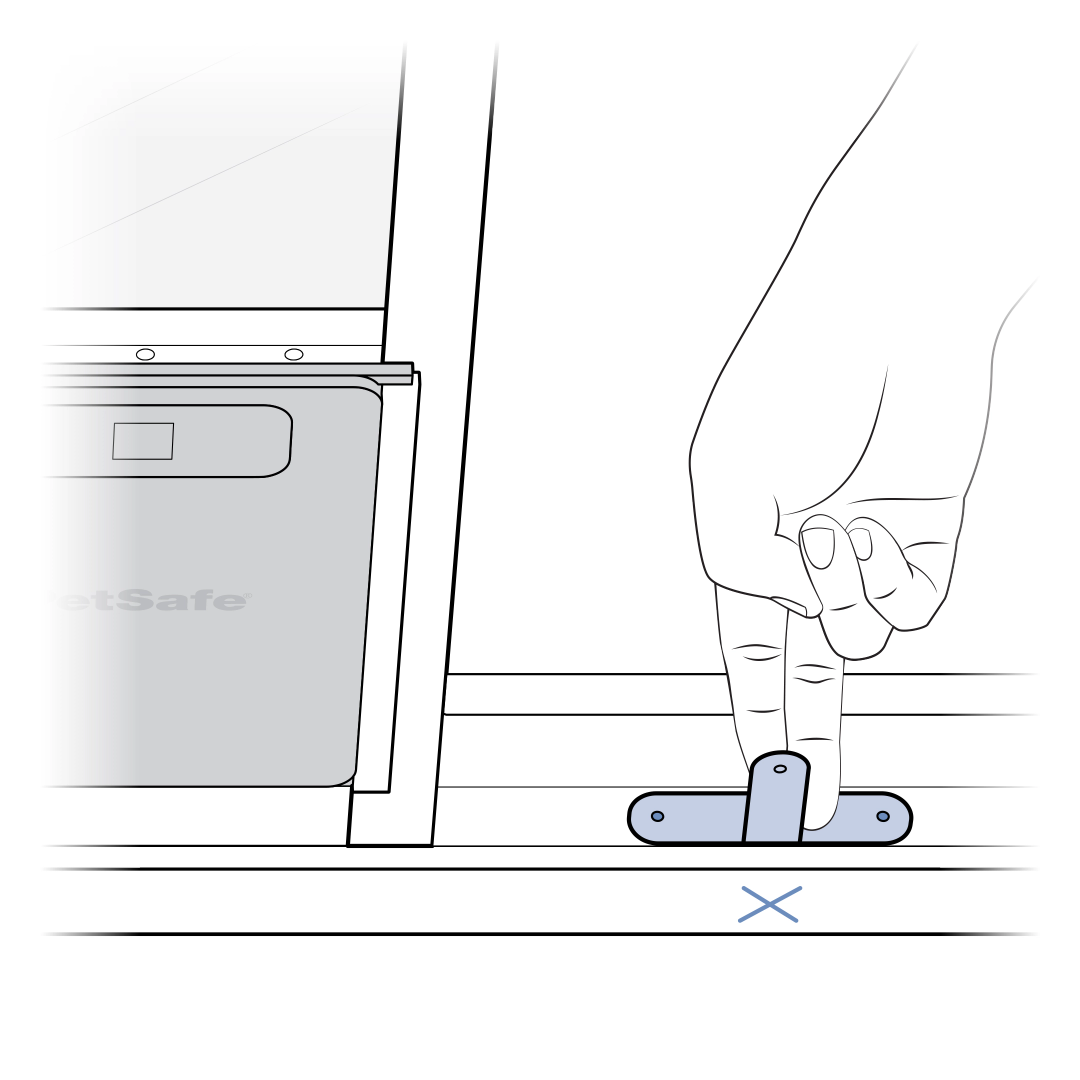
Line the middle of the T-bracket up with the lower mark. Press and hold it for 30-60 seconds on the lower sliding glass track to secure the adhesive.
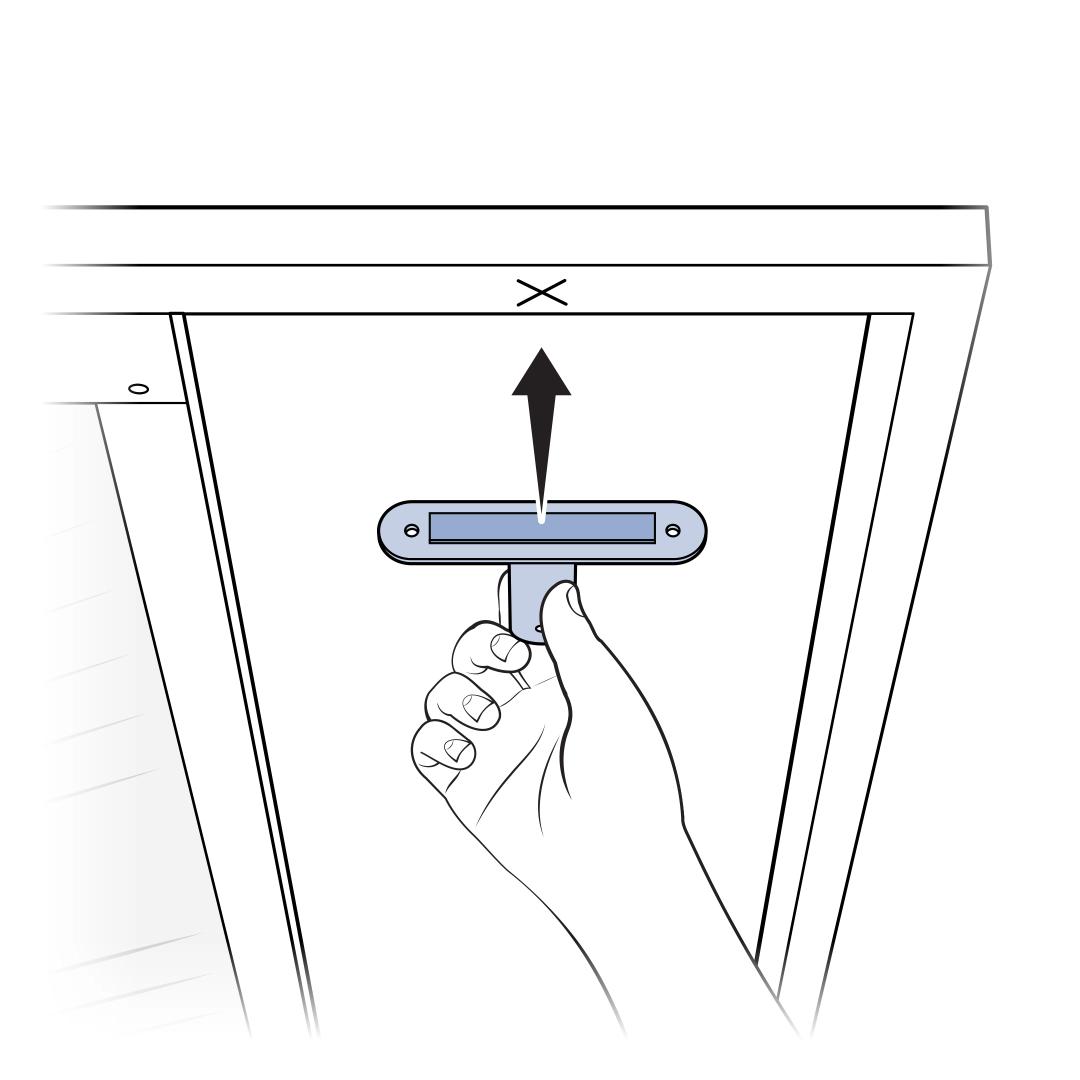
Line the middle of the T-bracket up with the upper mark. Press and hold it for 30-60 seconds on the upper sliding glass track to secure the adhesive.
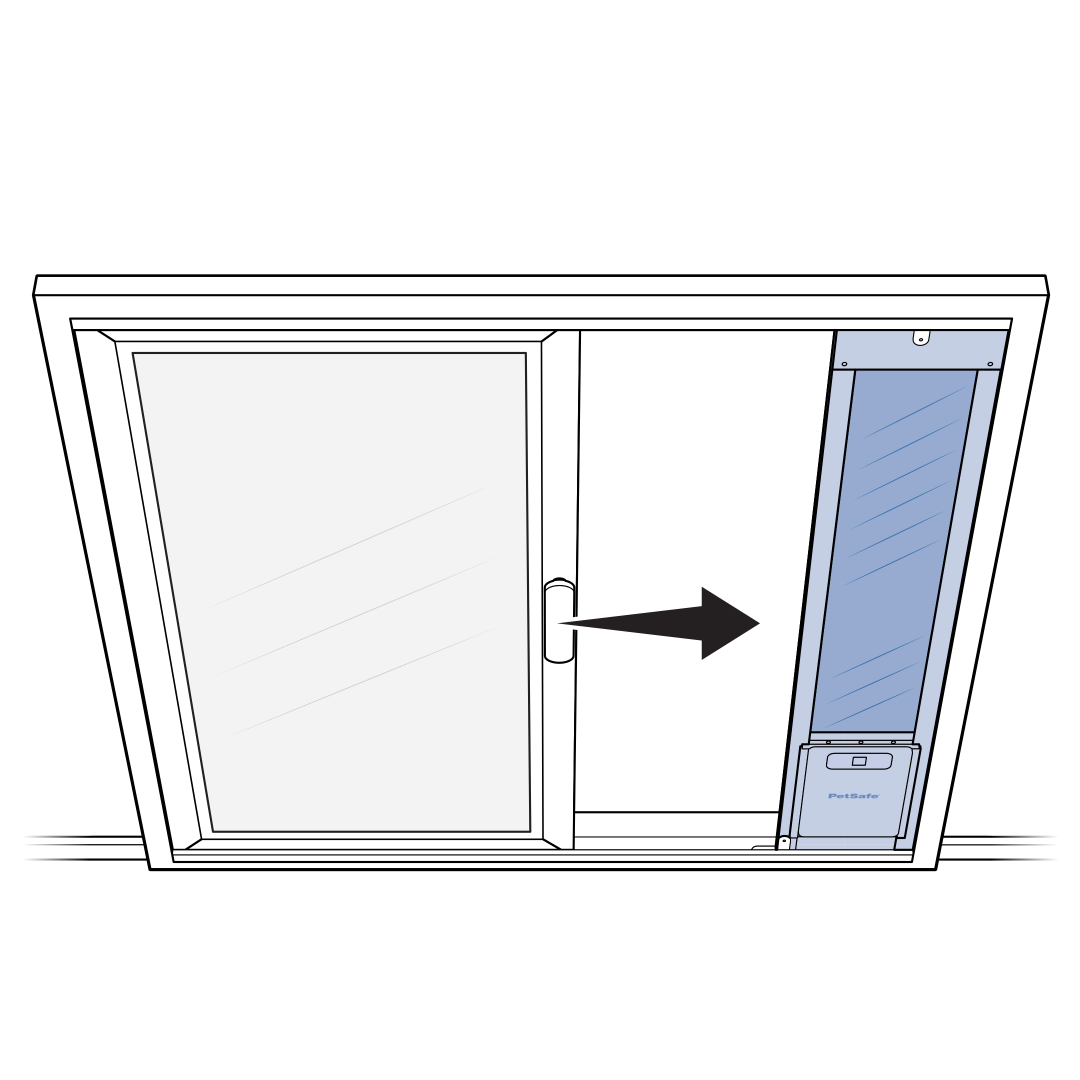
Slide the pet door panel all the way into the door jamb.
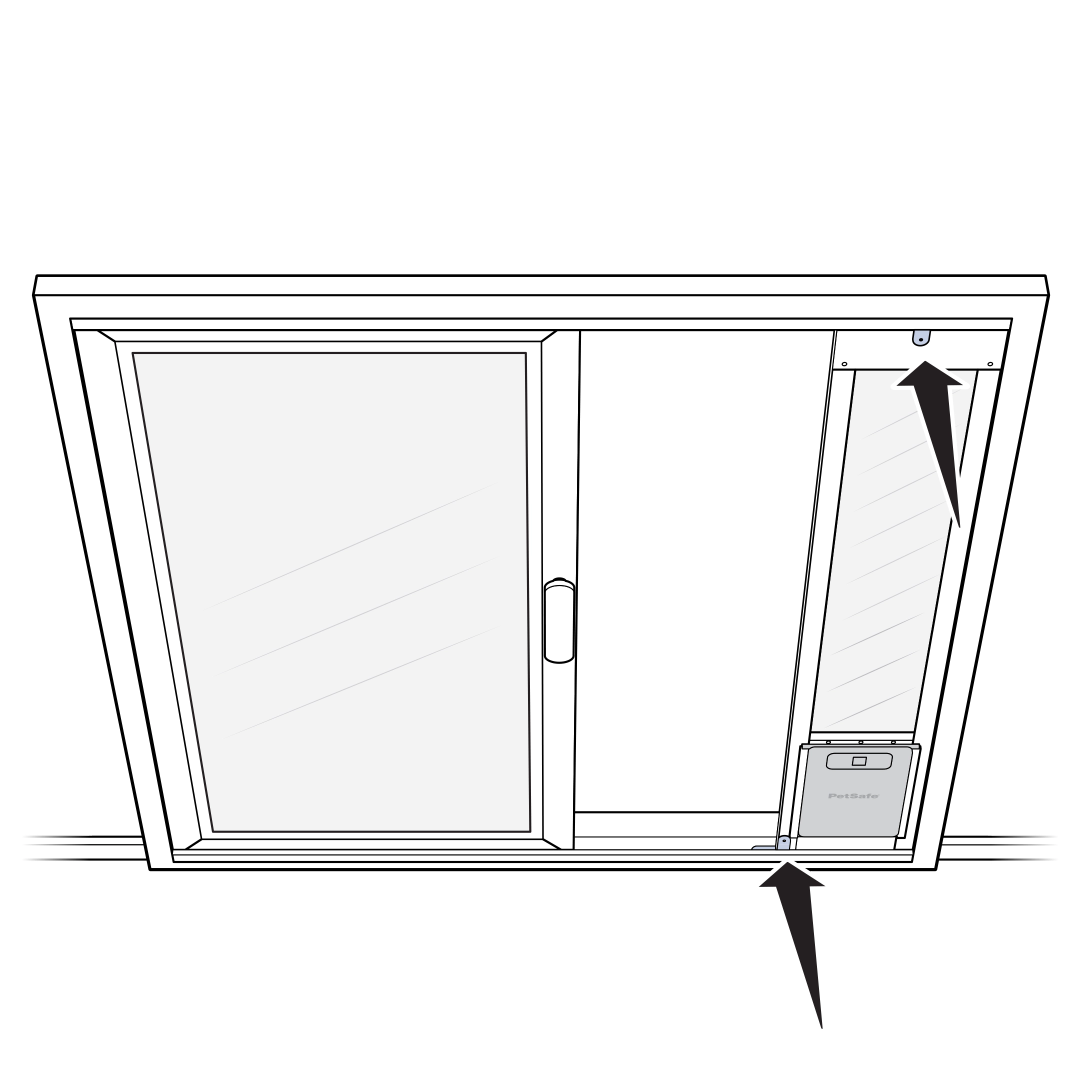
Ensure that the pet door panel is aligned with the T-brackets. Apply pressure to the T-Brackets for 30-60 seconds to secure the adhesive to the pet door panel.
Install the Lock
The lock assembly can be installed on the top or bottom of the sliding glass door, on the top or bottom of the stationary door, or on the lower track.
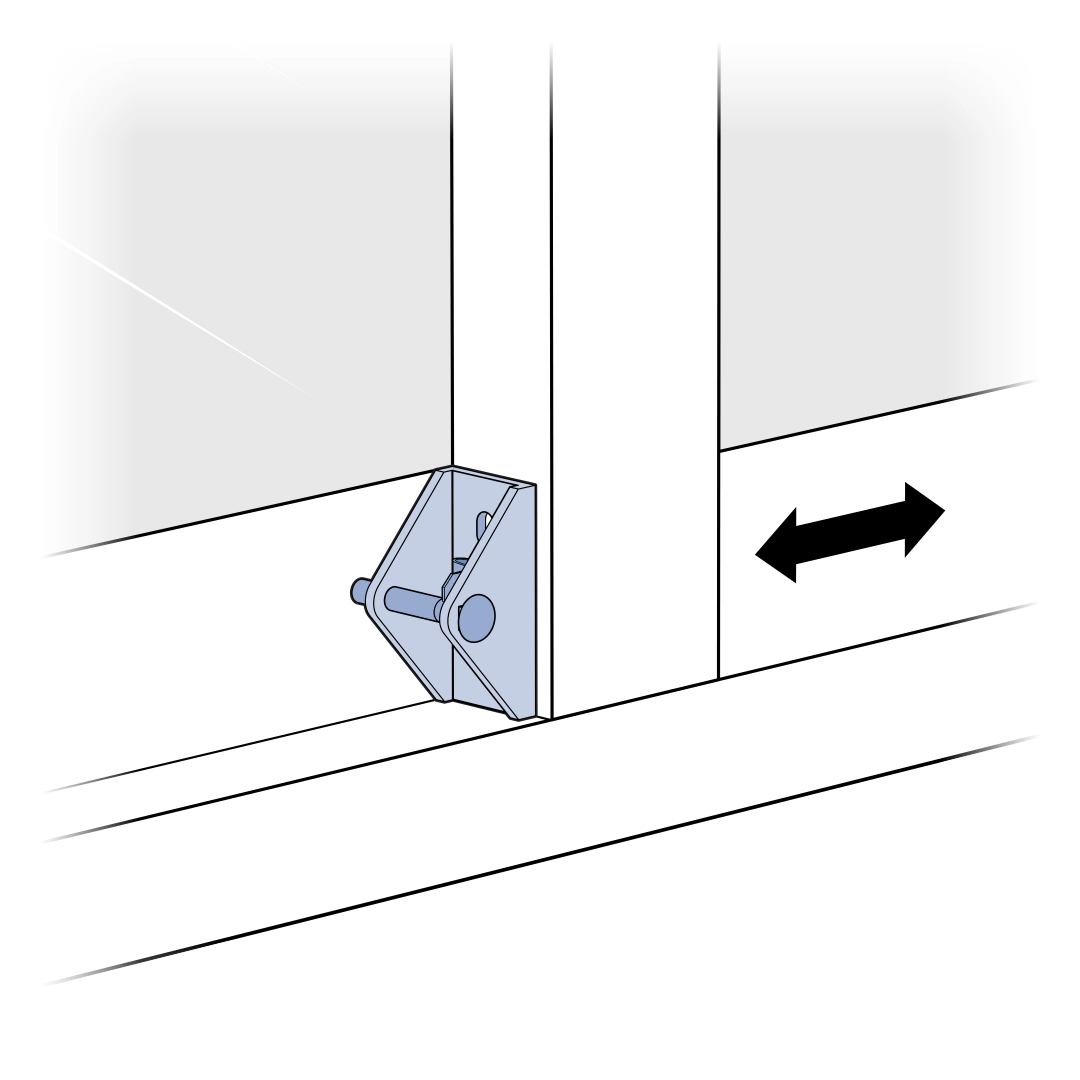
Lock Assembly On Sliding Door
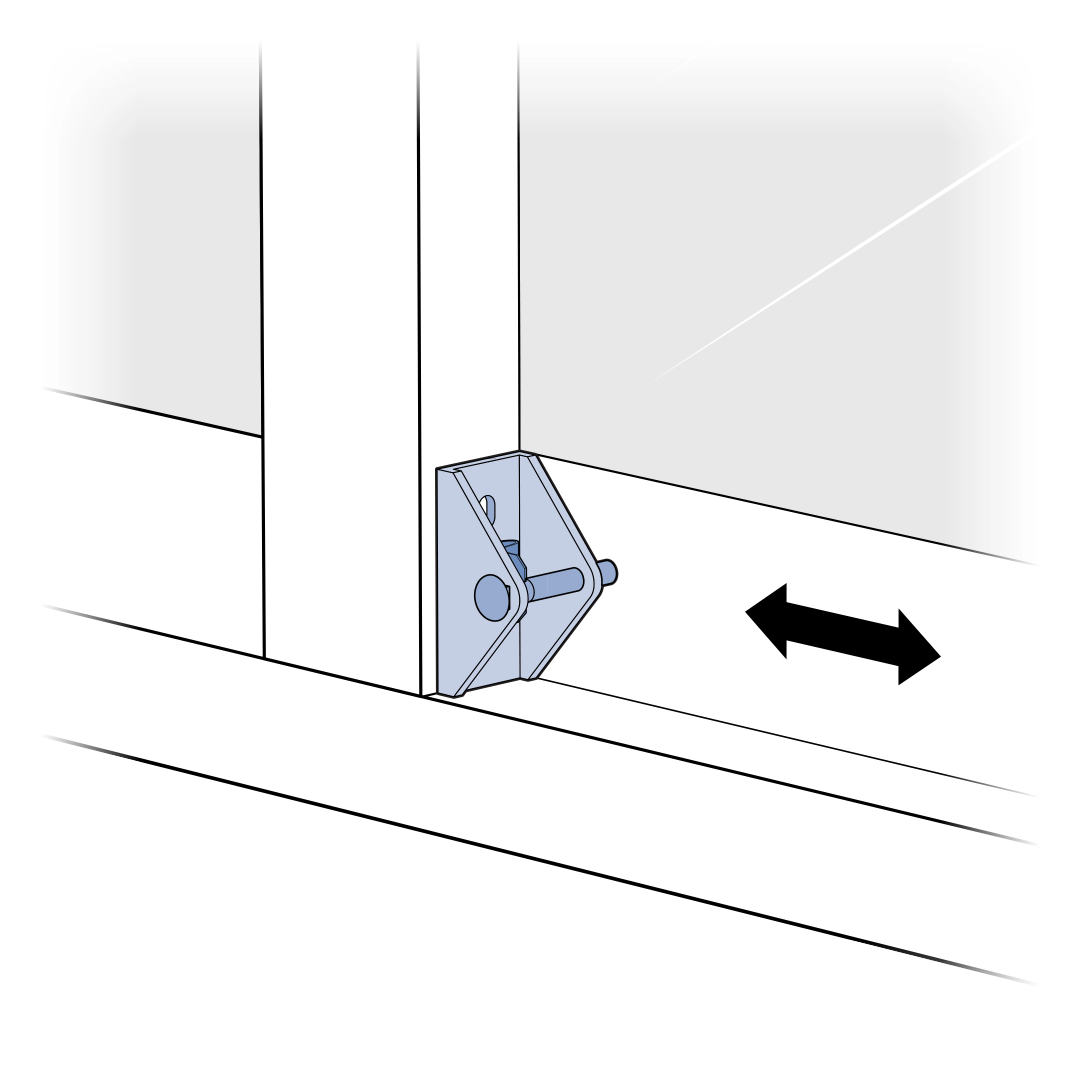
Lock Assembly On Stationary Door
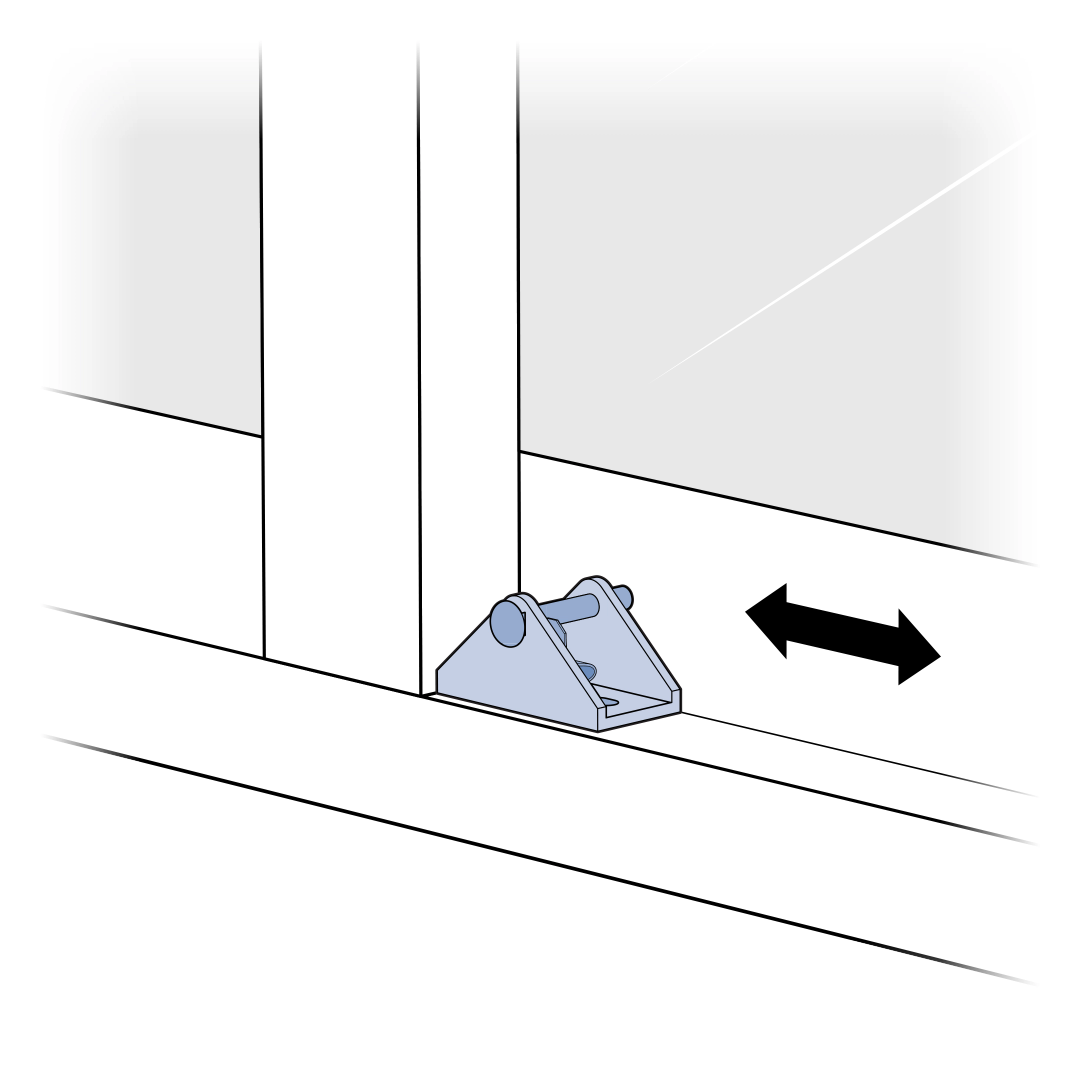
Lock Assembly On Lower Track
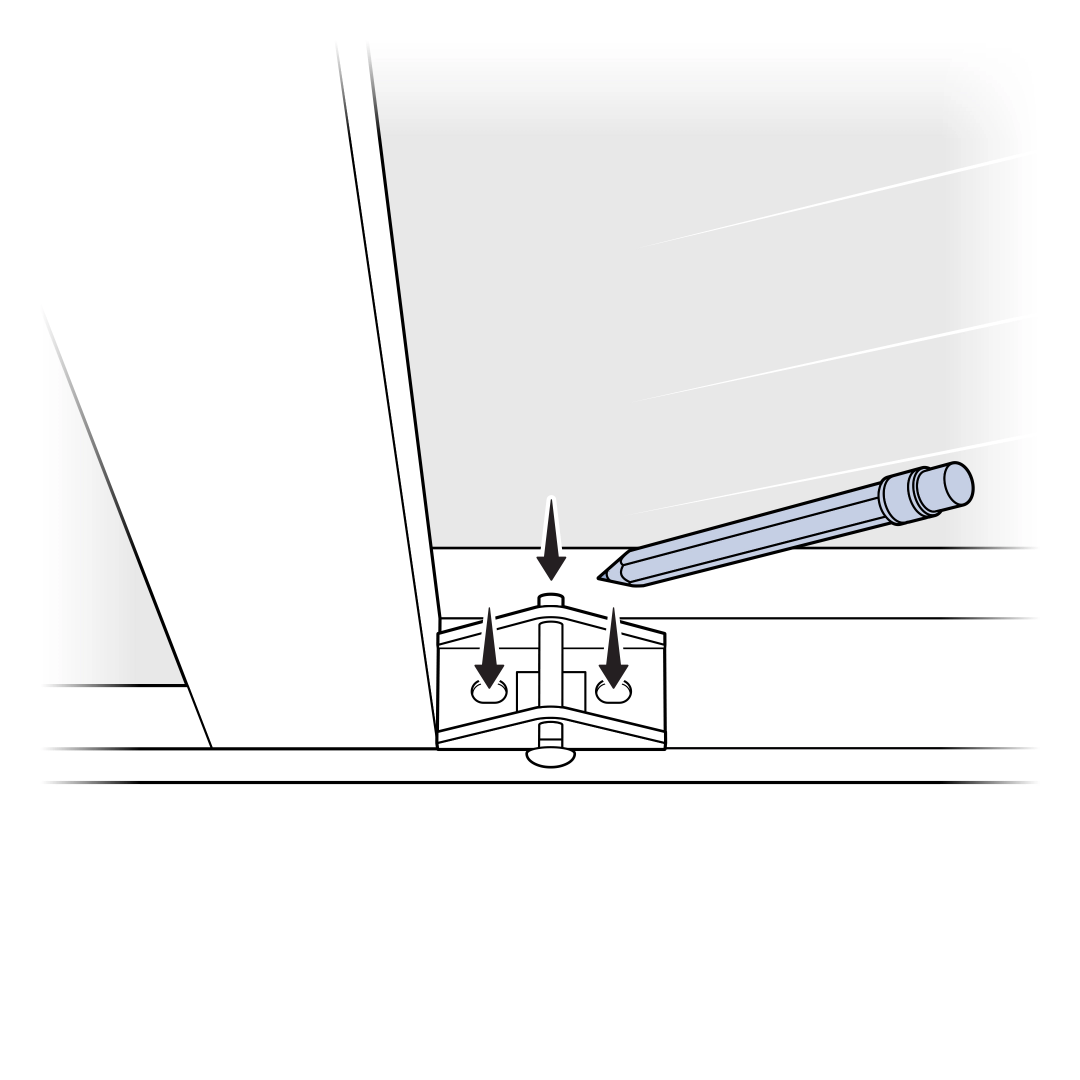
Once you have decided on the lock location, have the lock bolt retracted in the unlocked position. Close the sliding glass door completely, so that it is flush with the pet door panel. Place the lock where you would like, with the bolt tip facing the frame of the glass door leaving approximately 1/8” between the bolt tip and frame. Hold the lock firmly in place and mark the mounting screw holes and the bolt tip.
Make sure that the drill marks are not in contact with glass.
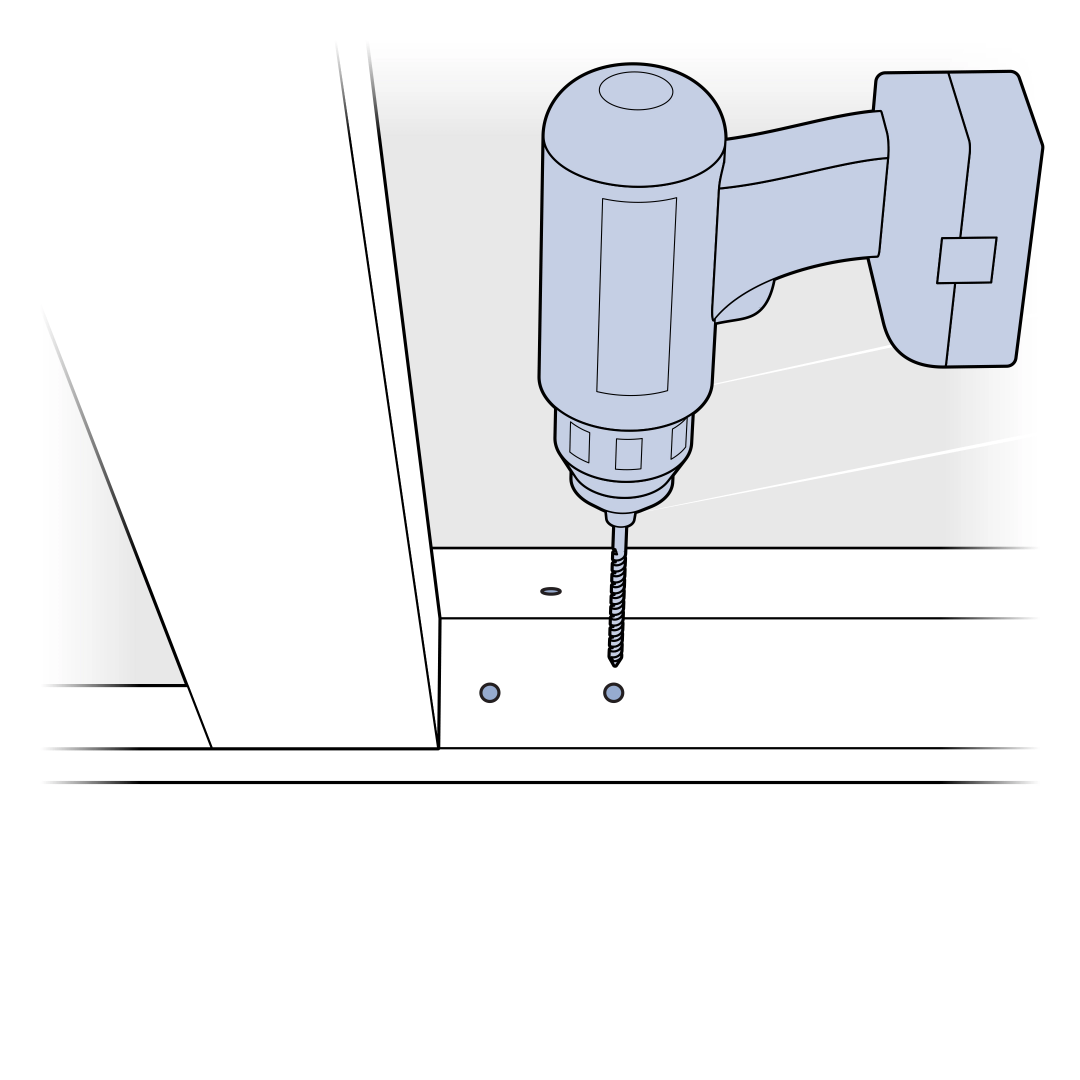
Drill two pilot holes for attaching the latch, ⁹⁄₆₄” (3.5 mm) for aluminum sliding glass doors and ⁷⁄₆₄” (2.5 mm) for wood or vinyl sliding glass doors. Drill a ¼" hole for the locking bolt.
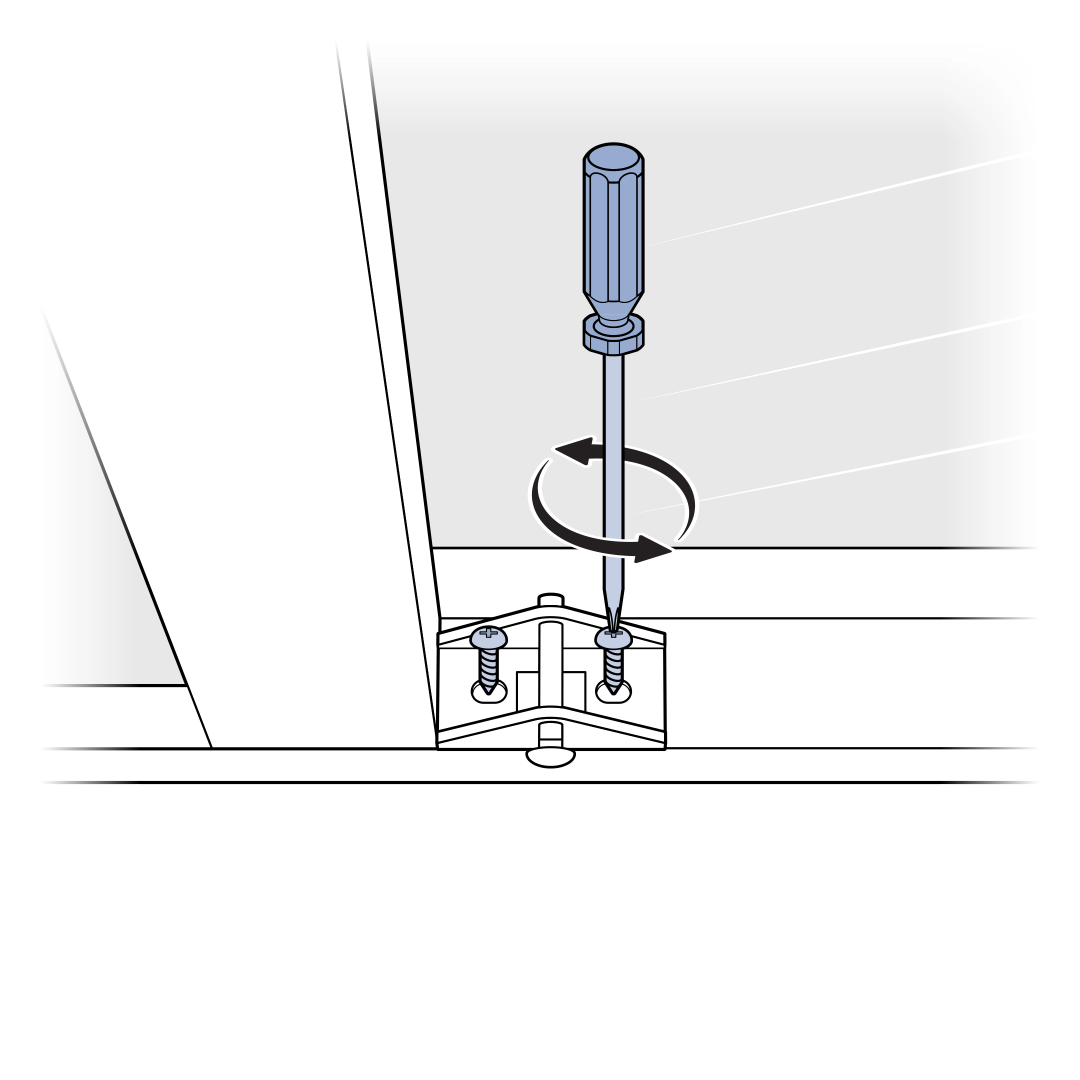
Using a manual screwdriver, secure the lock in place with two #8 x 12” sheet metal screws, being careful to not overtighten. Release the bolt into the hole to lock the door in place.
Weather-Proof Your Pet Door
Close the door, then clean the exposed edge of the sliding glass door with rubbing alcohol and allow to dry. The glass sweep forms a seal along the glass of the fixed door to improve energy efficiency. For some sliding glass door installations, additional glass sweep may be required to create the desired seal.
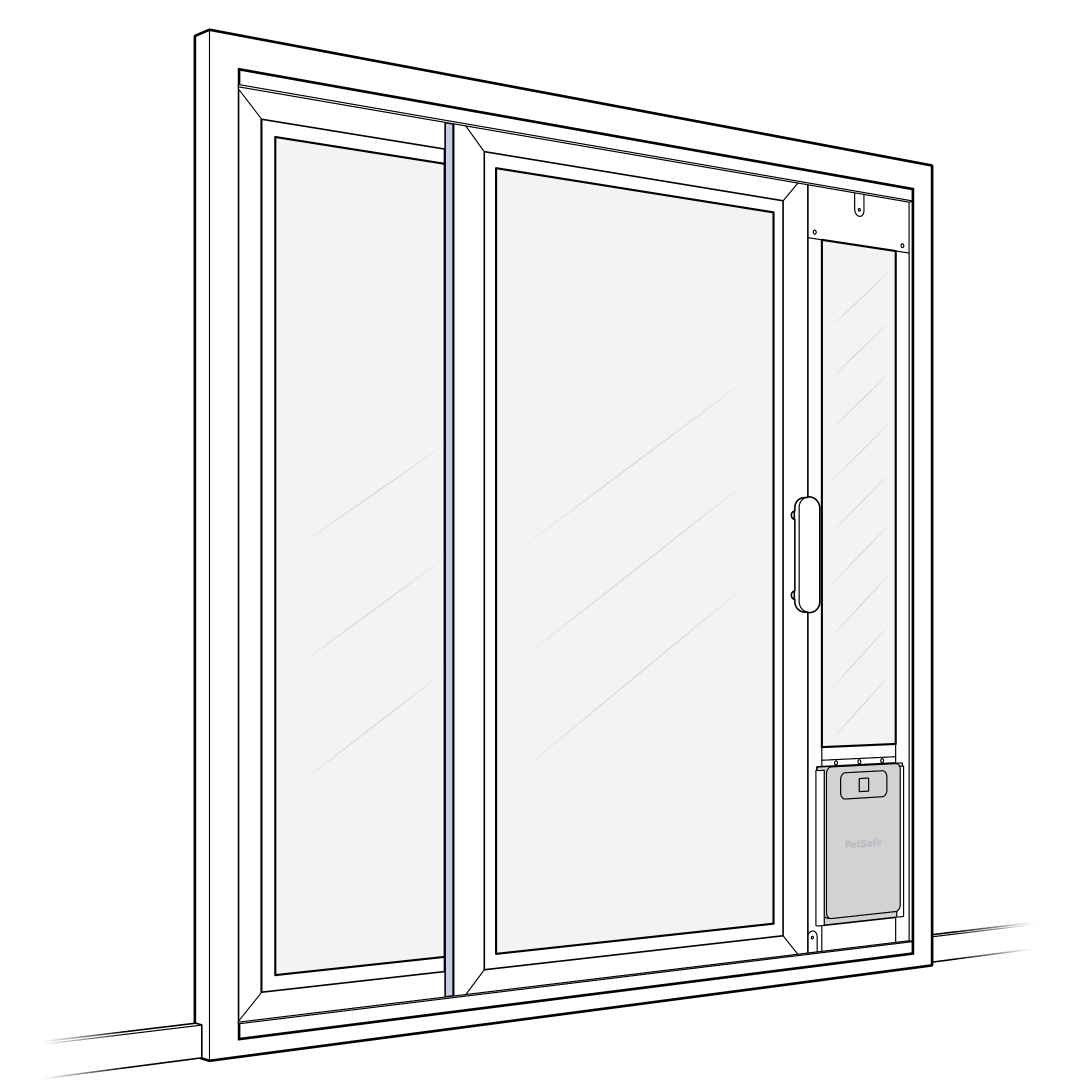
Place the glass sweep along the back edge of the sliding glass door. Position the adhesive to the outer edge of the door having the sweep brush against the fixed door.
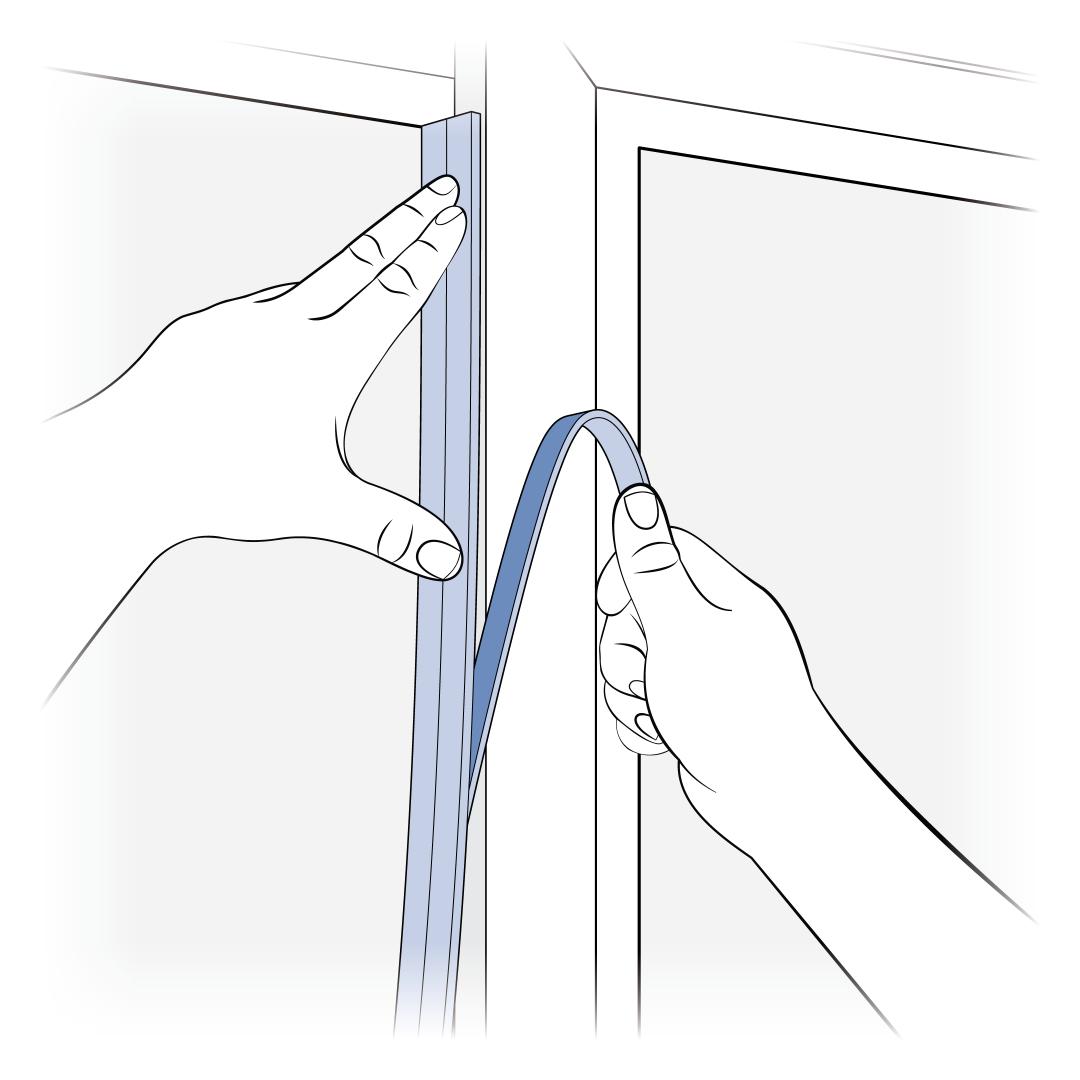
Starting at the top, peel the backing off and press in place while moving down the door. Ensure the sweep is lightly brushing the fixed door.
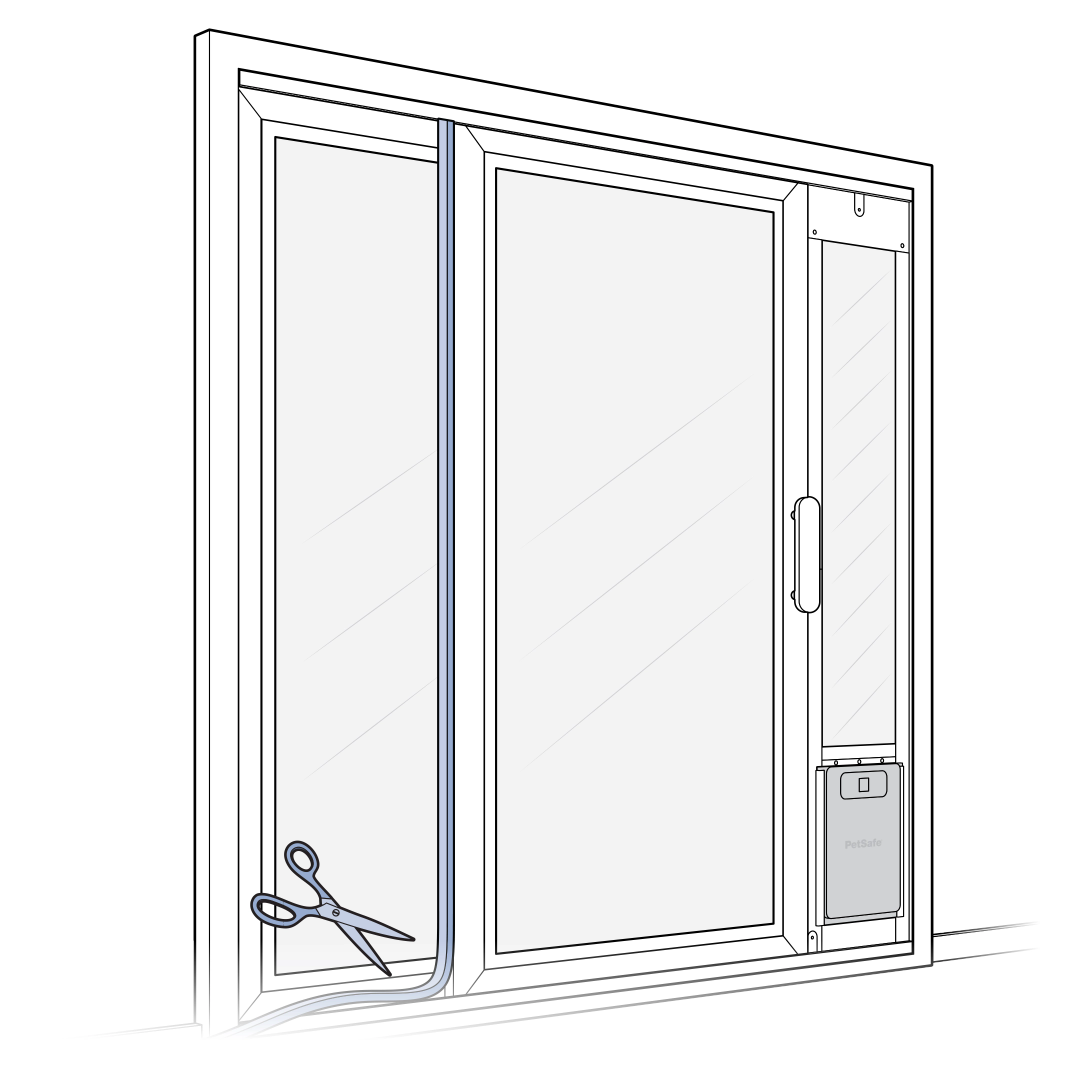
Trim any excess glass sweep with scissors.
Additional Security
An optional security bar can be purchased and installed for additional security. If you would like to learn more or purchase the security bar, visit our website here.
If you have already purchased the security bar, for detailed instructions, visit our article How to Install and Use the PetSafe® Sliding Glass Pet Door Security Bar.
Contact Customer Care
If you need further assistance, please contact our customer care team.