How To Plug My PetSafe® Guardian® GPS 2.0 Dog Fence + Tracking Charging Base in and Charge the Collar
Important: The charging base will apply any firmware updates to the collar while it is charging. Both collar status LEDs will slowly pulse white if an update is in progress. DO NOT remove the collar from the base until the update is complete.
To Plug in the Charging Base
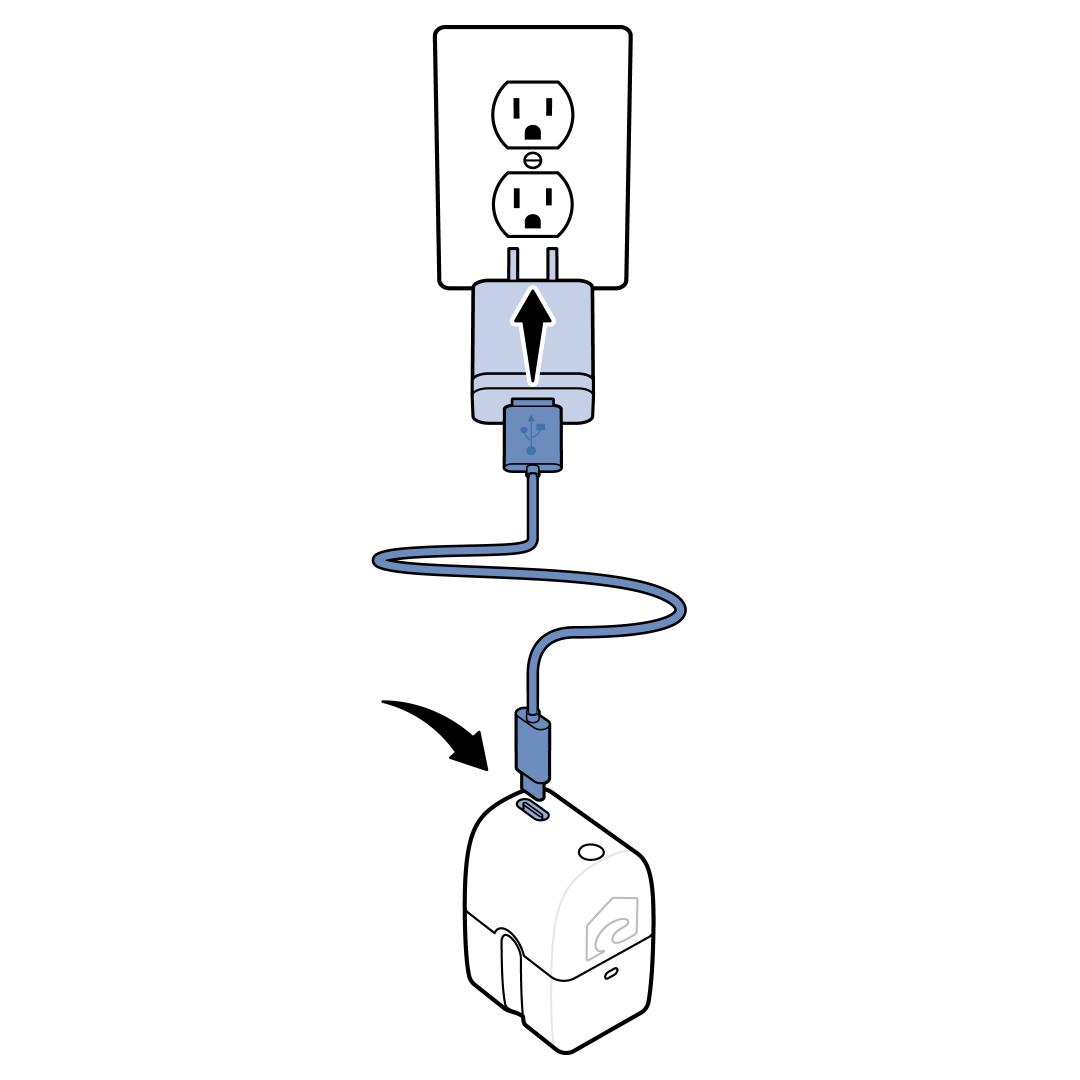
Plug the USB-C into the wall adaptor and then the wall adaptor into a standard electrical outlet indoors. It is recommended that this be done before plugging into the charging base.
Connect the other end of the power cable to the USB-C port on the back of the charging base.
To Charge the Collar
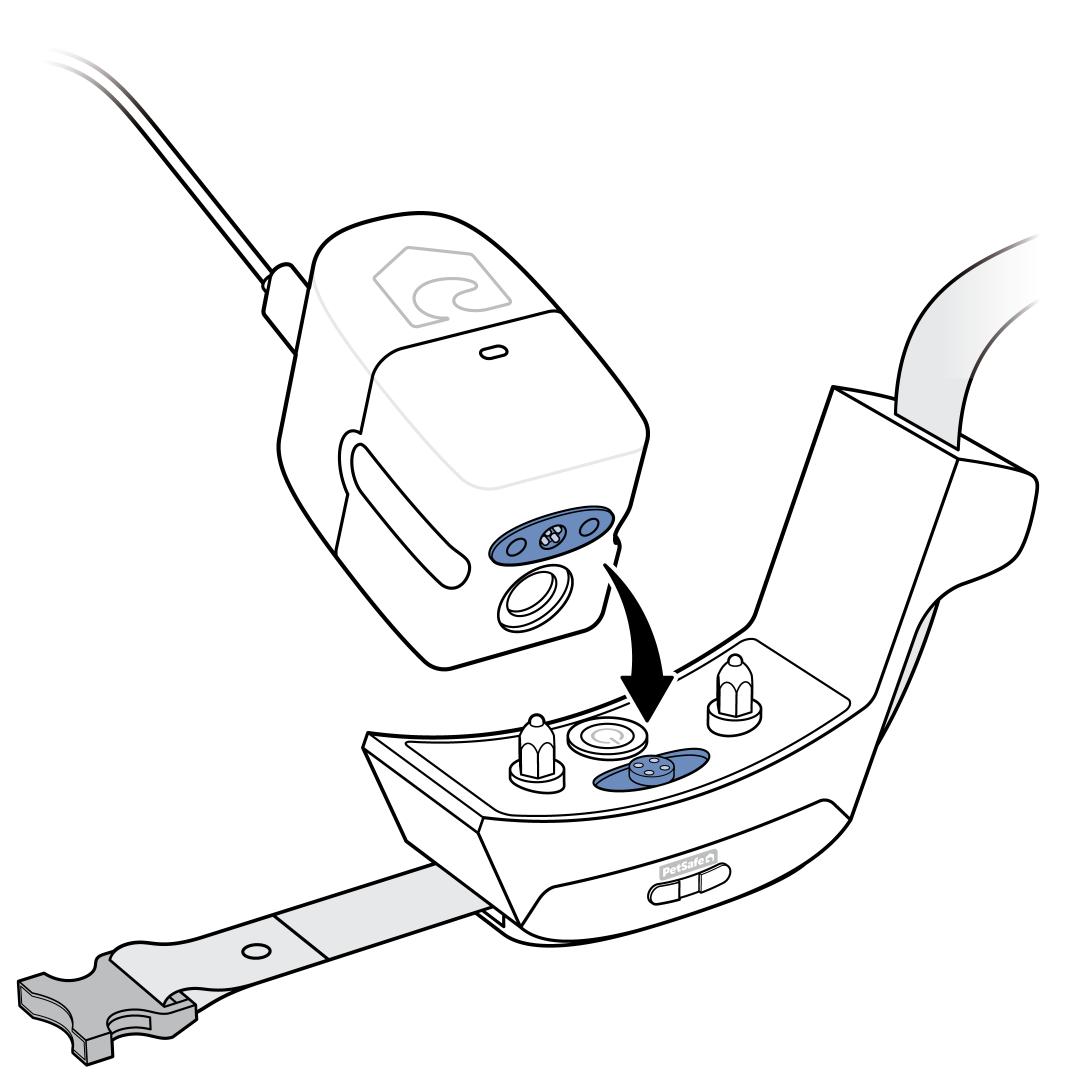
Place the collar on the charger, making sure the charging points (above the power button) on the collar match up with the charging port on the base.
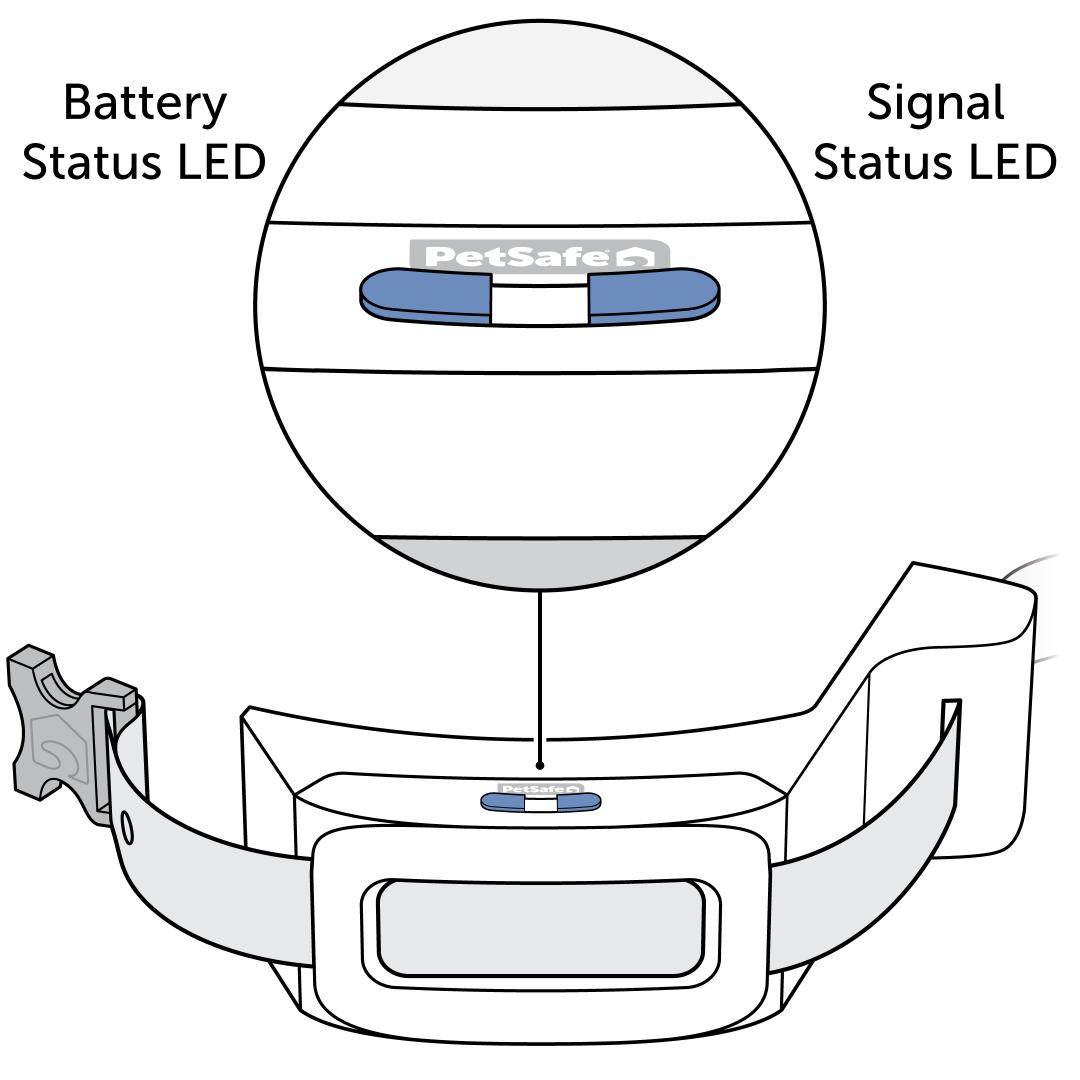
The collar will beep low to high when connected to the charging base. The collar’s Battery Status LED will pulse green when the collar is charging.
Remove the collar from the charging base when it is fully charged, indicated by a solid green Battery Status LED. The collar will beep high to low when removed.
During use, the Battery Status LED will flash once every 4 seconds (green, yellow, or red) to indicate battery status. For more information on the status lights, visit What Do the Lights on My PetSafe® Guardian® GPS 2.0 Dog Fence + Tracking Collar Mean?
Each charge can last up to 70 hours, depending on the frequency of use. Make sure to turn off the collar when not in use to preserve the battery. Visit How To Turn My PetSafe® Guardian® GPS 2.0 Dog Fence + Tracking Collar On and Off.